Showing posts with label Appetizer. Show all posts

Sunday, April 26, 2015

Glazed Kielbasa Pineapple Bites

Perfect New Year's {gluten free!} appetizer. {I also thought thick ham steak chunks would be good in place of the Kielbasa.}
Photo Credit to Jam Hands
Glazed Kielbasa Pineapple Bites
1 (14 oz.) regular Kielbasa, sliced
1 (20 oz.) can pineapple chunks, reserve juice
3 Tbsp. Teriyaki sauce
1 Tbsp. sweet chili sauce
1 Tbsp. honey
1 Tbsp. pineapple juice (from can)

Preheat oven to 425-f degrees. Line a baking sheet with parchment paper.
Place a piece of pineapple on top of a slice of kielbasa and stick a toothpick into them.
In a small bowl combine remaining ingredients. Place kielbasa bites onto the baking sheet and brush glaze over tops and sides of bites.
Bake for 15 to 20 minutes until hot. Let cool slightly and serve warm.

Recipe Source: Jam Hands

Friday, September 26, 2014

Barbecue Chicken Quesadilla

I love simple, easy, and quick. This is definitely one of those! You for sure need to add a side of vegetables, or fruit, or, in our case, both.

Photo Credit to Mrs Harding Cooks
Barbeque Chicken Quesadillas
onion, sliced (one small onion was about right for two quesadillas)
olive oil
dash salt
dash sugar
chicken, cooked and shredded (we had 2 leftover drumsticks)
sharp cheddar cheese, shredded
mozzarella cheese, shredded (any kind of cheese you have will do)
barbecue sauce
tortillas

Caramelize the onions: Heat olive oil over medium-low heat (about 1 T to 1 onion), add onions, salt and sugar and cook, stirring occasionally, for 20-30 minutes.

Wipe out the skillet from the caramelized onions and heat to medium. Pile onions, shredded chicken and cheese on tortilla. Drip a few dollops of barbecue sauce over it, then top with a second tortilla. Toast quesadillas in skillet for a couple minutes on each side, till cheese is melted and tortillas are lightly browned.

Serve with extra barbecue sauce for dipping, if desired.

Recipe Source: Mrs Harding Cooks

Tuesday, April 1, 2014

{Homemade} Gyoza

My dad served a mission in Japan and is, therefore, super picky about any Japanese food. He swears these are the most authentic gyoza he has ever had here in the states. I'm not sure how authentic they are, but I trust my dad. Plus they're delicious.
Vegetarian Gyoza (potstickers)
Photo Credit to No Recipes
{Homemade} Gyoza
2 pounds ground pork
1 head napa cabbage, shredded
1 package chives {jo tai}
3 teaspoon fresh minced ginger
salt
pepper
1 teaspoon sesame oil
1/4 cup soy sauce
gyoza skins

Mix pork-soy sauce in a large bowl. Place about 1/2 tablespoon meat mixture in each gyoza skin. Wet the edges of the skin and pinch it together to seal.
Fry until bottom of gyoza is brown, add water, then boil for 8-12 minutes.

Recipe Source: Brother Eyre

Monday, February 10, 2014

Cheesy Bacon Oven Chips

Okay, these were amazing. Cheesy and oh. so. delicious. I will definitely be making these again, and probably again.
Photo Credit to Vittles & Bits
Cheesy Bacon Oven Chips
3 medium potatoes, sliced evenly 1/8" thick {I used red potatoes, and…yes!}
cooking spray
3/4 C. shredded colby jack or cheddar cheese
salt & pepper to taste
2 T. crumbled bacon (about 2 slices) {I used real bacon bits}
chopped parsley or chives, for garnish

Chipotle Ranch Dipping Sauce
1 T. ranch dressing
3 T. sour cream
1/4 t. chipotle chili powder
1/8 t. cayenne (adjust more or less depending on how spicy you want)
1/8 t. salt
1/8 t. garlic powder

For the Chipotle Ranch Dipping Sauce: place all ingredients in a small bowl, and stir to combine. Refrigerate to allow flavors to meld together.

For the chips: Preheat oven to 375 degrees.
Bring sliced potatoes to a boil in cold, salted water to cover for 5 minutes. Carefully drain, and transfer slices to a paper-towel lined countertop or cutting board. Pat to dry.
Grease a baking sheet with cooking spray, and lay out potato slices so they are overlapping on it. Spray lightly with additional cooking spray, then sprinkle with salt & pepper to taste. Sprinkle evenly with shredded cheese & bacon.
Bake 12-14 minutes in preheated oven until cheese is melted & bubbly. Serve with chipotle ranch sauce.

Recipe Source: Juju Good News 

Saturday, February 8, 2014

Peanut Butter and Jam Skillet Monkey Bread

You can never go wrong with peanut butter and jam. Never. Seriously I love the combination so much. Yeah, I'm pretty sure I've said this before, but I used to mix peanut butter and jam for a snack. Then, my roommates would get mad that I left it in the fridge and it looked gross. Not gross, amazing. So these are wonderful and beautiful.

Photo Credit to Picky Palate

Peanut Butter and Jam Skillet Monkey Bread
1 can Refrigerated Biscuits, 8 count (I used the Simply line from Pillsbury)
1/4 cup butter, melted
1/4 cup granulated sugar
1/4 cup creamy peanut butter, warmed in microwave until liquid like {I probably used more…double?}
1/2 cup jelly of choice, warmed in microwave until liquid like {Also, used just a little more}
4 tablespoons heavy cream
1/2 cup powdered sugar

Preheat oven to 350 degrees F. and spray 9-inch cast iron skillet with non-stick cooking spray.
Cut each biscuit into fourths. Place melted butter into a large ziplock bag and toss in cut biscuits. Shake around to coat then toss in sugar, mixing to combine. Pour into prepared 9-inch cast iron skillet and drizzle warmed peanut butter and jelly over top. Bake for 18-22 minutes or until cooked through and golden.
Whisk the heavy cream and powdered sugar until combined then drizzle over warm biscuits. Serve warm.

Recipe Source: Picky Palate

Friday, February 7, 2014

Sticky Chex Mix

Oh my. I love this stuff. Every time I get around it, I lose all willpower and seriously eat all of it. I just made a batch and I think the rest of my family had around 3 cups in total. I ate the rest. Yes I am disgusting, and yes, I love it. I have had some buttery versions of this, but that is why I love this version, not too buttery. Hallelujah.

Sticky Chex Mix
6 1/2 c. Rice Chex
4 1/2 c. Golden Grahams
1 c. sliced almonds
2 c. coconut
Optional: M&Ms, Reeses pieces, anything else your little heart desires
3/4 c. (1 1/2 sticks) real butter
1 c. sugar
1 c. light Karo syrup
1 tsp. vanilla

In a VERY LARGE bowl, combine cereal, almonds, and coconut {just an FYI, I just used whatever cereal I had to made 11 cups mixed together}. Set aside. In a large saucepan, combine butter, Karo syrup, and sugar. Bring to a boil, reduce heat, and cook for three minutes. Remove from heat and stir in vanilla. While the mixture is still hot, pour over the cereal mixture and stir well so the candy mixture coats the cereal. Serve in a large bowl or divide into individual portions.

Recipe Source: Slightly adapted from Our Best Bites

Thursday, November 21, 2013

{Microwave} Caramel Popcorn

So an awesome lady from my mom's ward gave me this recipe for my wedding and I just barely tried it. It only took 5 and a half years. It was delicious! And super easy!
Homemade Microwave Caramel Corn
Photo Credit to Kitchen Parade
{Microwave} Caramel Popcorn
1-1.5 bags of popcorn
1.5 cups peanuts {optional}
1 cup brown sugar
1/2 cup butter
1/4 karo syrup
1/2 teaspoon salt
1/2 teaspoon baking soda

Microwave mixture of brown sugar through salt in a glass bowl for 3-4 minutes, stirring after each minute. Stir in baking soda. Pour mixture over popcorn in a paper bag and shake well. Microwave for 1 1/2 minutes. Remove and shake well, microwave again for 1 1/2 minutes. Eat and enjoy!

Recipe Source: Janelle Bond

Corn Dip

Easy yummy summer dip. Just make sure you put it together a little while before to let the flavors meld.
Photo Credit to Inspired by Charm
Corn Dip
3 (11-oz.) cans sweet corn & diced peppers, drained
7-oz. can chopped green chiles
6-oz. can chopped jalapeno peppers, drained and liquid added to taste
1/2 c. green onion, chopped
1 c. mayonnaise
1 c. sour cream
1 tsp. pepper
1/2 tsp. garlic powder
16-oz. pkg. shredded sharp cheddar cheese
2-3 bags scoop-like corn or tortilla chips

In a large bowl, mix all ingredients except chips. Chill two hours to overnight. Serve with your favorite chips (I used Fritos and Tostitos) for scooping. Makes 6 cups.

*Note: This dip can get runny if you don’t drain everything really well. Also the longer it sets, the more the cheese soaks up any liquids.

Recipe Source: Inspired by Charm

Creamy Spinach and Artichoke Dip

Not healthy, even though it has spinach…and artichokes. But…oh…so…delicious.
creamy-spinach-artichoke-dip
Photo Credit to The Girl Who Ate Everything
Creamy Spinach and Artichoke Dip
1 (10 ounce) package frozen chopped spinach (thawed and drained well) OR 10 ounces fresh spinach, chopped
1 (14 ounce) can artichoke hearts, drained and coarsely chopped
1 (8 ounce) package cream cheese, softened
2 Tablespoons sour cream
2 Tablespoons mayonnaise
1/2 cup shredded parmesan
1/2 teaspoon garlic salt, or more to taste
dash of cayenne pepper, or more to taste

Preheat oven to 400 degress. In a medium bowl, warm cream cheese in microwave for about a minute to soften. Add spinach, artichokes, sour cream, mayonnaise, and parmesan. Mix all together and add garlic salt and cayenne to taste. Don't worry, if using fresh spinach it will reduce down while cooking.

Place in an oven safe dish and bake in the oven at for about 20 minutes or until the top is toasty. If you're using fresh spinach bake for 20 minutes, stir, and bake for an additional 10 minutes if needed.
Serve with bread, chips or veggies.
*Note: Good idea that I haven't tried: thinly slice crusty bread, spritz it with olive oil and lightly sprinkle cayenne pepper on top. Place in the oven at 400 degrees for a couple of minutes until the tops are barely toasted.

Wednesday, November 20, 2013

Stuffed Pizza Rolls

Another awesome appetizer found on my family's appetizer night. These were probably the favorite, and my mom has made them again already!
Photo Credit to ourbestbites.com
Stuffed Pizza Rolls
1 roll refrigerated pizza dough {or make your own}
marinara/pizza sauce
2 T grated Parmesan cheese
1 T olive oil or melted butter
1/2 t garlic powder
1 t dried Italian seasoning
mozzerella cheese
Pizza toppings of your choice: ie, ham and pineapple, pepperoni slices, sausage, etc.

Preheat oven to heat specified on pizza dough package. Usually it’s 400 degrees. If you make your own dough, 400 is usually a good heat as well.

Unroll your pizza dough onto a lightly floured surface. Pat or roll the dough so it’s about 12″ by 8″. You’re going to want to cut it into 24 squares, so just eyeball it if you need to. Use a pizza cutter.

Place cheese and desired toppings on each square. (Note that you’re not putting the marinara sauceon the dough- it’s for dipping after) You guys are smart, right? Just eyeball how much. You just need to be able to enclose the toppings in the dough so keep that in mind. 

Recipe Source: Our Best Bites

Fajita Dip

We had an appetizer night with my family. This was one that I brought and I was very excited to have people super excited about my dip. It was better with chips {in my opinion} but you can have some bread, too.
So Cal Fajita Dip
Photo Credit to Making Life Better
Fajita Dip
1 1/2 cups beef sirloin, thinly sliced and chopped in 1/2" pieces, plus a few extra pieces for garnish
1/2 cup chopped red, green, yellow and orange bell peppers (plus a few julienned pieces for garnish)
1/4 yellow onion, sliced, and caramelized for garnish
1 package (8 oz.) Neufchatel cheese
1 cup fat free mayonnaise
1 cup freshly grated Parmesan cheese
1 1/2 Tbsp. onion soup mix
1 French baguette, sliced for serving {Or tortilla chips, my personal preference}

In a large saute pan over medium high heat add the meat and cook for 2-4 minutes or until done. (To slice the meat ultra thin and with ease, stick the meat in the freezer for 15 minutes before slicing.) Remove to a separate dish and set aside.

In the same pan, add the peppers and cook over medium heat until perfectly sauteed. Remove to the dish with the meat, removing a few pieces of the meat and peppers onto another plate for garnish.
In the bowl of a food processor, add the mayonnaise, cream cheese, Parmesan and Onion Soup Mix. Process until smooth, and pour out into a large bowl. Add the peppers and meat, and stir until well combined. Place everything in an 8x8 inch baking dish and heat the oven to 350 degrees. Bake for 30 minutes and top with caramelized onions, and the reserved meat and peppers. Serve with baguette slices  {and/or tortilla chips}.

Recipe Source: Making Life Better

Wednesday, March 13, 2013

Asian Turkey Meatballs with a Lime Sesame Dipping Sauce

Christmas Eve Party called for a great new appetizer and this is what I found. Everyone loved it! And it was delicious as well. Because it was Asian...and I love Asian food.

Asian Turkey Meatballs with a Lime Sesame Dipping Sauce
4 tbsp soy sauce
2 tbsp water
2 tbsp lime juice
2 tsp sesame oil
1/4-1/2 tsp honey, to taste
1 scallion, chopped

1 lb ground turkey
1 egg
1/4 cup of fresh cilantro, chopped
2 tbsp scallion, finely chopped
1 tbsp ginger, minced
1 clove of garlic, minced
1/4 cup of panko crumbs
1 tbsp soy sauce
2 tsp sesame oil
Sea salt and freshly cracked pepper, to taste

Combine the soy sauce, lime juice, water,sesame oil, green onion, and honey together in a dish. Whisk until well combined; set aside.

Preheat the oven to 500 degrees. Coat a baking dish with cooking spray.

Combine the ground turkey, egg, green onion, cilantro, ginger, garlic, panko, soy sauce, sesame oil, sea salt and freshly cracked pepper, to taste together in a large bowl. Gently mix the ingredients until well combined.

Shape 1/4 cup of mixture into a ball then place into the baking dish. Repeat with the remaining meat mixture.

Place the meatballs into the oven and bake until cooked through, about 15 minutes. Serve immediately along with the dipping sauce. Enjoy.

Recipe Source: For the Love of Cooking

Friday, March 8, 2013

Butternut Squash Stuffed Shells with a Lemon Sage Brown Butter Sauce

A pinterest find. Oh pinterest, how I love thee. Now, I made these for dinner, but after doing that, I decided that they were supposed to be made for appetizers. They were just missing something. I think I ate 7 or 8 (or 10) of them, but I still wasn't satisfied. So, I will only make them for appetizers, but I will most definitely be making them again. (And you have to make the brown butter sauce...take my word for it).

Photo Credit to Proud Italian Cook

Butternut Squash Stuffed Shells 
w/ Lemon Sage Brown Butter Sauce
1 tablespoon olive oil
1 butternut squash, peeled and chopped
16 ounces jumbo pasta shells
2 cups ricotta
1/3 cup parmesan cheese
1 garlic clove
1/4 cup frozed chopped spinach, squeezed and drained
1 egg
Salt
Pepper
Lemon peel, grated
1 stick butter
10 sage leaves {or sprinkle some ground sage in}
Fresh Lemon juice

Toss squash in oil and roast in hot oven at 425 for 15-20 minutes.
Cook your jumbo pasta shells according to directions.
Add the ricotta through lemon peel in a bowl and mix well.
Stuff the shells with the mixture and place in a buttered dish {I ended up using an 8x8 and 9x13}.
Make the sage brown butter sauce by melting butter in a sautƩ pan until golden brown and bubbly. Add the sage and cook for a couple minutes, then add the lemon juice.
Place your shells in a 400F oven until heated through around 20-25 minutes. When finished spoon your warm sage sauce all over and sprinkle with grated parmesan.

Recipe Source: Proud Italian Cook

Saturday, January 26, 2013

Stuffed Mushrooms

Another awesome recipe from my MIL. They are delicious and SO easy. The only problem is they're so delicious, that we eat the whole pan...which is a LOT. Ah well...worth the calories.

Photo Credit to eclecticark.blogspot.com
Stuffed Mushrooms
1/2 pound sausage
4-6 ounces cream cheese
about 10 large mushrooms {or I use a package of regular mushrooms}

Cook sausage, drain grease. Mix with cream cheese. Wash mushrooms and take stems out. Put upside down in baking dish and fill each with sausage mixture.

Bake at 350 for 20 minutes.

Recipe Source: Sharrie Webster

Monday, January 21, 2013

Light & Fluffy Dinner Rolls

So my mom gets rolls for the Warren Christmas party basically every year. We used to get them from a bakery that made fluffy, buttery, scrumptious rolls that were to die for. Now, she gets some great rolls, but cannot remember where she got "the rolls." Luckily, I came across this recipe. They are the closest things to "the rolls" I've ever found and they are so good I can't stop eating them (no matter how much willpower I don't have).

Light & Fluffy Dinner Rolls
Makes 48 rolls
1 1/2 cups of milk
3/4 cup + 1 Tablespoon Sugar
1 egg
1 Tablespoon salt
2 Tablespoons yeast
2 cups of warm water
about 9-10 cups of all purpose flour
at least 1 cup of butter

Photo Credit for all photos to howdoesshe.com
To start out: Scald 1 1/2 cups of milk, 3/4 cup sugar and 1/2 cup of butter, in a microwave safe bowl, for about 2 minutes. Cutting the butter into pieces helps it melt faster. There will probably be some little cubes of butter still floating in the hot mixture, they will melt.

We are going to add yeast to this hot mixture, but it will be too hot to just dump the yeast straight in (it would kill it!). To cool it down stir in 1-2 cups of flour, then add 1 egg and 1 Tablespoon of salt, and leave it to cool for a couple of minutes. Meanwhile, in a measuring cup dissolve 2 Tablespoons of yeast in 2 cups of warm water and 1 Tablespoon of sugar. Let it sit for a couple of minutes until it is bubbly.

**Keep track of how much flour you are adding!!!
Make sure your milk mixture is just warm, not boiling and add the yeast mixture!
Using a fork or wooden spoon, gradually stir in 9-10 cups of flour (counting the flour you have already added to cool it earlier). I would recommend only adding 2 cups at time and stirring in between. These rolls turn out so much better when they are mixed by hand.
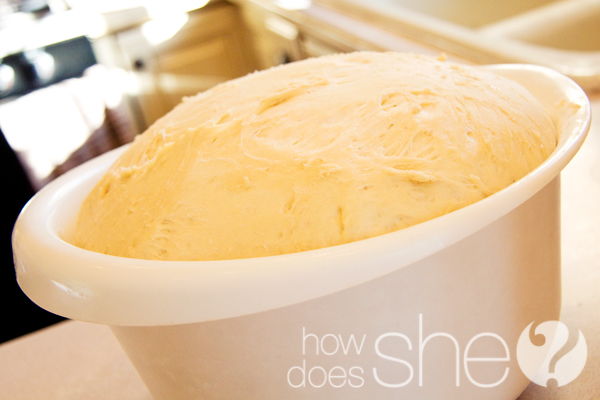
At the end the dough will be dense and sticky, and may be hard to stir, you can use your hands to incorporate the rest of the flour if needed. Be sure not to add too much flour. Then smooth the dough out and cover the bowl with plastic wrap. Leave it in a warm place and let it raise.
I came across this fun Thanksgiving idea on Pinterest – for Gratitude Rolls. I thought it was so cute and wanted to show you all how it’s done! Gather a list of things for which your family is thankful. Type it up in columns, then print it out. Yes, my 3-year-old said he was grateful for chocolate milk.. but I’m pretty sure we can all agree
Cut the list into strips with scissors or a paper cutter. Then set them aside.
When your dough is close to raising completely, butter 2 cookie sheets and set them aside.
Let the dough raise until it has doubled in size.
Cover your working space with flour to prevent the dough from sticking. Dump your dough out and divide it into 4 balls. Eyeball the sizes, then lift them up and feel the weight of each ball. Try to make them even, but they don’t have to be perfect.
Using one ball of dough at a time: roll the dough into a circle on a floured counter. Once it is rolled out spread the top with butter from edge to edge. You will use about 2 Tablespoons per circle of dough.

Cut the dough into quarters using a pizza cutter.

Then cut each quarter into 3 pieces. You should end up with 12 triangles from each circle of dough.

If you would like to add the thankful notes, now is the time!

Place one thankful note lengthwise on the triangle of dough.

Make sure you spread plenty of butter when using these notes, It will prevent them from sticking!Whether or not you include a thankful note, you will roll the dough starting with the wide end of the triangle.

Tuck the tail of the triangle under the roll and place it on the buttered cookie sheet. You will make 3 rows, with 8 rolls per row. This will give you 24 rolls per pan. Two balls of dough will fill 1 pan. You will get a total of 48 rolls!

Pre-heat your oven to 350 degrees. Place the pans of rolls in a warm place (on top of the oven if possible) to let them rise. Once they are touching and full in size, cook (one pan at a time) in the oven ’till they are golden brown. About 10 – 15 minutes, It may take longer depending on how hot your oven cooks. Keep a close eye on your first pan to get the right time for the second.

While they are still hot and fresh out of the oven run a stick of butter over the tops of the rolls for a delicious buttery glaze.

The kids will love opening these thankful rolls. It’s just like a fortune cookie!

Read aloud the many things you are grateful at your Thanksgiving feast.

Make it a game and guess who’s thankful note you are reading!

These yummy dinner rolls will be a hit at any event!

Recipe Source: How Does She

Friday, January 11, 2013

Spinach Dip

My mom has made this spinach dip at every Thanksgiving and Christmas party she has attended for the last...10 years? It's delicious, easy, and SO yummy. Everyone loves it. (The secret is, she got the recipe from the box).
Knorr Spinach Dip
Photo Credit to knorr.com
Spinach Dip
1 package frozen, chopped spinach
16 ounce sour cream
1 cup mayonnaise
1 package Knorr vegetable dip
1 can water chestnuts
3 green onions

Combine all ingredients and chill about 2 hours. 
Serve with your favorite dippers {my favorite are tortilla chips and French bread} to your favorite people.

Recipe Source: Knorr

Cheese Ball

Another one of my mom's awesome recipes. Maybe it's not awesome, but I love it because I grew up with it! You should try it, because it's awesome.
Photo Credit to Yankee Magazine
Cheese Ball
8 ounce cream cheese
8 ounces cheddar cheese
4 chopped whole green onions
1 tablespoons worcestershire sauce
1 tablespoons mayonnaise
1/2 teaspoon garlic salt
dash of pepper
1 cup walnuts, chopped

Mix together well. Form into a ball with your hands, roll in chopped walnuts.

Saturday, December 8, 2012

Cookies & Cream Peanut Butter

Remember my obsession with peanut butter? Just another fact to prove that fact. I tried this recipe.
I probably shouldn't have, but you can bet your bottom dollar I'm going to make it again. It added sweet creaminess, and chunky cookies. It is SO good, although very hard to only eat one spoonful at a time...
Photo Credit to picky-palate.com
Cookies & Cream Peanut Butter
10 whole Oreo Cookies{Next time, I'm not going to use fresh cookies so I don't get as big of a crunch}
2 Cups creamy peanut butter
1 cup white chocolate chips
2 tablespoons creamy peanut butter

Crush Oreos into small pieces and place into a large bowl. Add 2 cups peanut butter.
Place white chips and 2 tablespoons peanut butter into a double boiler and stir until melted. Add to bowl of Oreos and peanut butter. Stir just a little so you have a bit of swirls of chocolate throughout. Place peanut butter into a jar or eat from the bowl...

Recipe Source: Adapted from Picky Palate

Friday, December 7, 2012

Creamy Green Chile Dip

Never in my life have I made a recipe. I mean, made something up. Slowly but surely, I've "ventured". Not measuring something here, substituting something there...finally, here it is. My very own recipe. Well, the original idea actually came from a jalapeƱo popper dip from My Baking Addiction, but since I didn't have everything I needed, I improvised a LOT, so I'm calling it my own. It was simple, but yummy, and the everyone at Christmas party I took it to raved and...it only lasted about 8 minutes.

Post image for Jalapeno Popper Dip
Photo Credit to mybakingaddiction.com
Creamy Green Chile Dip
Makes 3 cups{ish}
1 (8 ounce) packages cream cheese, softened
1/2 cup mayonnaise
1 (4 ounce) can chopped green chilies, drained
1/2-3/4 cup shredded Monterey Jack cheese
1 cup Panko bread crumbs
1/2 cup freshly grated parmesan cheese

Preheat oven to 350 degrees and spray an oven safe serving dish with non-stick cooking spray.

Using an electric mixer, blend the cream cheese and mayonnaise until smooth.Stir in green chilies, and Monterey Jack cheeses. Spoon this mixture into the prepared baking dish.

Mix together the Panko and parmesan cheese and sprinkle it over the cream cheese mixture. Spray the Panko and parmesan with a quick spray of non-stick cooking spray.

Bake for 25-30 minutes or until the mixture is hot and the topping is lightly browned.
NOTES:- If you are in a hurry, skip the Panko/Parmesan topping and simply microwave the cream cheese mixture until hot and bubbly {From Jamie at My Baking Addiction}

Recipe Source: Highly adapted from My Baking Addiction

Tuesday, July 24, 2012

Fresh Fruit Bruschetta with Orange-Honey Cream


Yay! A delicious fruit appetizer that I LOVE. It took one or two to get used to the flavor, but I'm now addicted. I ate them three days straight! I'm contemplating trying to make it lime-honey cream next time...but we'll see (I've had this thing with lime lately). Try these at home sometime (so you can eat as many as you want without sharing!)


Fresh Fruit Bruschetta with Orange-Honey Cream

1 baguette or similar-sized French bread loaf
4 Tbsp. butter, melted
2 Tbsp. granulated sugar
1/2 tsp ground cinnamon

1-1/2 C diced strawberries (about 10 medium strawberries)
1 C finely diced mango (about 1 medium mango)
1 C finely diced kiwi (about 3 kiwi)

1/2 C Sour Cream (I recommend full fat)
3 Tbsp. honey
1 tsp orange zest

Preheat oven to 400 degrees. Slice bread into 1/2 inch slices. Place in a single layer on a foil-lined baking sheet. Use a pastry brush to brush each piece with melted butter. Combine cinnamon and sugar and sprinkle evenly over bread slices. Bake for 10-12 minutes or until edges are toasted. Set aside to cool.

While bread is toasting, combine Breakstone’s Sour Cream, honey, and orange zest. Stir to combine and place in the fridge.

Combine strawberries, mango, and kiwi and stir gently to combine. When bread is cooled, place about 1 Tbsp. of fruit mixture on top of each toasted bread slice and drizzle with sweet sour cream mixture. If needed, thin sour cream sauce with 1/2-1 tsp orange juice. Garnish with mint leaves if desired. Serve immediately. {I actually recommend waiting a few minutes to soak the bread a little...that's just if you don't want super crunchy bread.}

Recipe Source: Our Best Bites