Showing posts with label Breakfast. Show all posts

Sunday, April 26, 2015

Sweet Potato Breakfast Skillet with Bacon

Do I seriously need to say anything more? I've made it a bunch and it's delightful.
Sweet Potato Breakfast Skillet with Bacon
Photo Credit to Allergy Free Alaska
12 ounces of bacon, cut into 1-inch pieces {or 16 ounces...}
Additional bacon fat, lard, ghee, or coconut oil
5 cups diced sweet potatoes (about a 1/2 inch dice)*
4 cups diced zucchini
1 cup chopped onion
1 red bell pepper, chopped
6 large eggs
Black pepper to taste

In a 12-inch cast iron skillet, cook the bacon pieces over medium-low heat until crisp (cooking the bacon at a lower temperature will render more fat).
Use a slotted spoon to remove the cooked bacon from the pan. Set aside. There should be enough rendered bacon fat to coat the entire bottom of the skillet, about 1/8 inch deep. If your bacon didn’t render this much fat (it can vary from brand to brand), add additional bacon fat, lard, ghee, or coconut oil to your skillet until there is 1/8 inch of fat.
Preheat oven to 400 degrees (F).
Increase heat to medium-high and carefully place the diced sweet potatoes in the hot oil. Cook the sweet potatoes without stirring until the bottom of the cubes start to turn golden brown (this can take several minutes). Stir and cook until the cubes just start to soften.
Increase heat to high and add the zucchini, onion, and bell pepper to the skillet. Cook until the vegetables are just starting to soften.
Stir in bacon pieces. Remove from heat.
Make 6 wells in the potato and veggie mixture; break one egg into each well.
Place skillet in the oven and bake for 9-14 minutes, or until the eggs are set. Serve immediately.

*Note: Cut all veggies the night before to save tons of time in the morning.

Recipe Source: Allergy Free Alaska

Sweet Potato Crusted Spinach Quiche

Healthy and delicious. I love sweet potatoes!
Photo Credit to Fourteen Forty
Sweet Potato Crusted Spinach Quiche
2 medium sweet potatoes
Olive oil spray
1 bunch spinach
1/2 small onion
1 clove garlic
4 eggs
1 cup grated fresh mozzarella
Spring herbs (dill, parsley, chives) to taste
1 tablespoon organic white miso {I actually used tahini...this is optional}
1/4 cup white cheddar cheese
1/4 cup parmesan cheese
Sea salt and pepper to taste

Peel sweet potatoes and slice thinly with a food processor.
Lay potato slices out in pie dish in a crust-like fashion, spray with oil, and bake on 400 degrees fahrenheit for 15 minutes. (After crust has baked, reduce oven to 375 degrees fahrenheit.)
Spray a saute pan with oil and saute sliced onion and crushed garlic clove until lightly browned, about 7 minutes. Stir in spinach and saute until wilted and tender, about 4 minutes. Drain spinach over the sink to rid excess liquid.
Blend eggs and mozzarella in a medium bowl. Add herbs, white cheddar cheese, and miso {or tahini or nothing}.
Add spinach/garlic/onion mix to the egg/cheese mixture. Add salt and pepper to taste. Place the combined mixtures in the potato crust. Sprinkle with parmesan cheese on top.
In a 375 degree oven, bake until the quiche is firm and the cheese has browned, about 40 minutes.
Tastes best a little warm.

Recipe Source: Slightly adapted from Fourteen Forty

Veggie Ham and Egg Cheese Bake

I love hearty veggie breakfasts. This one was great to prep cut everything the night before.
Photo Credit to Skinnytaste
Veggie Ham & Egg Cheese Bake
2 cups shredded reduced fat sharp cheddar
1 tbsp olive oil
1/3 cup sliced scallions
5 oz sliced shiitake mushrooms {or regular}
1/2 cup chopped red bell pepper
7 oz finely diced lean ham steak
3/4 cup diced tomatoes, seeded
1 cup finely chopped broccoli florets
7 large whole eggs
5 large egg whites
1/4 cup fat free milk
1/2 tsp kosher salt
1/4 tsp ground black pepper
Preheat the oven to 375°F. Spray a 9 x 13 baking dish with oil.
Place 1 cup of cheese into the baking dish.
Heat the oil in a large nonstick skillet over medium heat; add scallions, mushrooms and red pepper and saute until vegetables are tender, about 5 to 6 minutes. Add the tomatoes and cook 2 - 3 minutes. Add the ham and broccoli and remove from heat. Spread evenly over the cheese mixture.
In a large bowl combine the eggs, egg whites, milk, salt and pepper and whisk well. Slowly pour over the vegetables in the baking dish and top with remaining cheese.
Bake until a knife inserted near the center comes out clean, 32 to 35 minutes. Let stand 8 to 10 minutes before cutting into 12 pieces.

Recipe Source: Skinnytaste

Healthy Whole Grain Waffles

Loved these. They were perfectly delicious.
Whole Grain Waffles with Greek Yogurt and Berries from Our Best Bites
Photo Credit to Our Best Bites
Healthy Whole Grain Waffles
1 1/2 cups 100% whole wheat flour
1/4 cup wheat germ*
2 tablespoons ground flaxseed meal*
2 teaspoons baking powder
2 tablespoons sugar or no-calorie sweetener, like Splenda
1/2 teaspoon salt
1 1/2 cups nonfat milk
1/3 cup canola oil
1 egg
1 teaspoon vanilla

*If you choose to omit wheat germ and flaxseed meal, add an additional 4 tablespoons flour (whole wheat or all purpose) instead.

Whisk together flour, wheat germ, flaxseed meal, baking powder, sugar, and salt. In a separate bowl mix together milk, oil, egg, vanilla, and oil and whisk until combined. Add wet ingredients to dry and whisk until just mixed together, (it’s okay to have some lumps) don’t over-mix.

Ladle into an electric waffle iron and cook according to your waffle-maker’s instructions until golden brown. (I use a heaping 1/2 cup batter for my 8″ round waffle iron). Serve warm with desired toppings.

Freezer Instructions: Lay waffles in a single layer on a baking dish in the freezer for a few hours. When frozen, place in a ziplock bag or freezer container. Reheat in toaster. Can also keep cooled waffles in fridge and reheat in toaster.

Recipe Source: Our Best Bites

Tuesday, September 23, 2014

{Healthy} and Delicious Refrigerator Bran Muffins

Okay, I was waiting to write about these until I refrigerated the batter for awhile. And guess what? They're awesome! And delicious! and Healthy! {and have lots of fiber! Hehehehehehe}
Healthy and Delicious Refrigerator Bran Muffins
Photo Credit to Mel's Kitchen Cafe
{Healthy} and Delicious Refrigerator Bran Muffins
4 cups wheat bran flakes or plain wheat bran
2 cups bran buds (look like little pebbles) or all-bran (look like little twigs)
2 cups boiling water
1 quart (4 cups) buttermilk
8 tablespoons (1/2 cup) butter, melted
½ cup (no-added sugar) applesauce
2 cups sugar
4 large eggs
1 teaspoon pure vanilla extract
5 cups whole wheat flour
4 teaspoons baking soda
1 teaspoon salt

In a large bowl with a tight fitting lid, place the wheat bran flakes (or plain wheat bran) and the bran buds or all-bran. Pour the boiling water over the bran and mix well. Stir every couple of minutes while the mixture cools to room temperature. The mixture will become very thick and sticky.
After the mixture cools, add the buttermilk, melted butter, applesauce, sugar, eggs and vanilla. Mix well. Add the flour, baking soda and salt. Mix well to combine all the ingredients together.
The batter can be covered well and kept in the refrigerator for up to 30 days. To bake, scoop the batter into greased or lined muffin tins. Fill 3/4 full. Bake at 375 degrees for about 14-16 minutes, until a toothpick inserted in the center of a muffin comes out clean or with a few moist crumbs.

Recipe Source: Mel's Kitchen Cafe

{Healthy} Pumpkin Chocolate Chip Muffins

Ew, ew, yummy, yummy! These were so good. A stronger hint of pumpkin than I've ever had before and not too sweet, I loved these babies!

{Healthy} Pumpkin Chocolate Chip Muffins
Makes a dozen
1/2 cup white whole wheat flour (King Arthur)
3/4 cups unbleached all purpose flour (King Arthur)
3/4 cup raw sugar
3/4 tsp baking soda
1 3/4 tsp pumpkin pie spice
1/4 tsp cinnamon
1/4 tsp salt
1 1/2 cups canned pumpkin puree (not pumpkin pie filling)
2 tbsp virgin coconut oil (or canola)
2 large egg whites
2 tsp vanilla extract
baking spray
2/3 cup mini chocolate chips
Directions:

Preheat the oven to 350°F. Line a mini muffin tin with paper liners and lightly spray liners with oil for easy removal.

In a medium bowl, combine flours, sugar, baking soda, pumpkin spice, cinnamon, and salt with a wire whisk. Set aside.

In a large bowl mix pumpkin puree, oil, egg whites and vanilla; beat at medium speed until thick. Scrape down sides of the bowl.

Photo Credit to Skinnytaste

Add flour mixture to the wet mixture, then blend at low speed until combined; do not over mix. Fold in chocolate chips.

Pour batter into prepared muffin tin and bake on the center rack for 22 to 24 minutes, or until a toothpick inserted in the center comes out clean.

Let them cool at least 15 minutes before serving.

Recipe Source: Skinnytaste

Healthy Applesauce Oat Muffins

Funny story about these. They're delicious, and I can't wait to make them again. But, I put our butter in with the spices and it soaked up all the flavor from the spices, so I thought these had something weird going on with them...turns out it was just the butter {never mind that it took me 4 times of eating these muffins to figure that out}.
Healthy Oats and Applesauce Muffins
Photo Credit to Mel's Kitchen Cafe
{Healthy} Applesauce Oat Muffins
1 cup rolled/old-fashioned oats
1 cup unsweetened applesauce
1/2 cup milk
1 large egg
1 teaspoon vanilla
4 tablespoons butter or coconut oil, melted
1/3 cup sugar
3/4 cup whole wheat flour
1 teaspoon baking powder
1/2 teaspoon baking soda
1 teaspoon cinnamon
1/4 teaspoon salt
1/2 cup dried cranberries or raisins, optional

Preheat the oven to 375 degrees F. Line a 12-cup muffin tin with liners or grease the muffin cups. Set aside..
In a medium bowl, stir together the oatmeal, applesauce, milk, egg, vanilla, butter and sugar. Set aside.
In a large bowl, whisk together the flour, baking powder, baking soda, cinnamon and salt (and cranberries or raisins if using). Make a well in the center and pour in the applesauce mixture. Stir until just combined (don't overmix or the muffins will be dense and dry). The muffin batter texture might be a bit different (wetter?) than other muffin batters but no fear, carry on!
Distribute the batter evenly among the 12 muffin cups. Bake for 15-20 minutes until a toothpick inserted in the center comes out clean. Don't overbake or the muffins will be dry.
Remove the muffins to a rack to cool completely. Once cool, I place 6-9 muffins in a large freezer ziploc bag, suck all the air out (oh yes I do) and seal the bag, then freeze, pulling them out one by one to stick in my kids lunches or warm slightly for a snack.

Recipe Source: Mel's Kitchen Cafe

Strawberry Lemon Ricotta Pancakes

These were amazing! A great way to use up extra ricotta if you have it. They were thick and so yummy with the strawberry jam {oh yeah, I just used jam, and didn't make the syrup}.
Strawberry Lemon Ricotta Pancakes | www.tasteandtellblog.com
Photo Credit to Taste and Tell

Strawberry Lemon Ricotta Pancakes

For the pancakes:
3/4 cup all purpose flour
1 teaspoon baking powder
1/2 teaspoon salt
1/2 teaspoon ground nutmeg
2 beaten eggs
1 cup ricotta cheese
1/2 cup milk
1 tablespoon sugar
zest from 1 lemon
1 teaspoon lemon juice

For the syrup:
4 cups fresh strawberries, diced
2 cups sugar
1/4 teaspoon lemon juice

For serving:
fresh sliced strawberries

In a large bowl, combine the flour, baking powder, salt and nutmeg. In another bowl, combine the eggs, ricotta cheese, milk, sugar, lemon zest and lemon juice. Dump the wet ingredients into the dry ingredients and stir just until combined.
Heat a griddle over medium heat and lightly grease. Pour about 1/3 cup of the batter onto the griddle and cook until bubbly. Flip and cook until the pancake is golden.

{I didn't actually make the syrup, just used strawberry jam}
Process the strawberries in a food processor or blender until smooth. Pour through a wire mesh to remove all the seeds.
Combine the strawberry puree, sugar and lemon juice in a pan over low heat until the sugar dissolves. Bring to a boil, then reduce the heat and cook for 5 minutes. If foam forms on the top, use a spoon to skim it off. Remove from the heat and cool.
Recipe Source: Taste and Tell

Tuesday, September 16, 2014

Puffed French Toast

This stuff is so amazingly yummy, scrumpcious, unhealthy, and wonderful! They are kind of like the french toast sticks you get at Burger King. So yeah, I love them.
Photo Credit to Our Best Bites
Puffed French Toast
2 eggs
2 ½ Tbsp. sugar
½ tsp. salt
½ tsp. vanilla extract
2 c. milk
1 c. flour
2 ½ tsp. baking powder
12 slices Texas style toast, cut in half diagonally

In a large skillet or frying pan, heat about 1/4″ of vegetable oil (not olive oil) over medium heat. In a shallow bowl or pie plate, whisk together eggs, sugar, salt, vanilla, milk, flour, and baking powder. Test oil heat by flicking some water into the frying pan. If it pops, reduce the heat. If hardly anything happens, turn up the heat. If it sizzles, it’s just right.

Working quickly, take each 1/2 slice of bread and soak it both sides in the milk/egg/flour mixture. If you leave it in too long, it will get soggy, but you want to make sure enough of the egg mixture has soaked into the bread. Gently shake to remove excess batter and place in hot oil. Cook until puffed, golden brown, and a nice, crispy crust has formed on each side (probably 3-5 minutes per side; you really need to babysit them and make sure they’re cooking correctly) and then remove from oil and drain on a paper towel. While cooking remaining French toast, keep cooked pieces warm in an oven set to the lowest temperature it will go.

When ready to serve, roll each piece in cinnamon sugar.

Golden and crispy on the outside with a sugary crunch, and heavenly soft in the middle.

Slice the bread into strips for great french toast dippers. Kiddos love these- or talk about killer party food! You could pile them high on a platter and then serve next to ramekins filled with different dipping sauces.

Recipe Source: Our Best Bites

Wednesday, May 28, 2014

{Overnight} Banana {or any Fruit} Stuffed French Toast

So these were good. They were a little more mushy than I like {Because I let them sit overnight in the fridge}, but so yummy. And I love that you can prep it the night before. It's easy and very versatile, so you could put any fruit in the middle!
Photo Credit to The Girl Who Ate Everything
1 cup mashed banana
1/2 teaspoon lemon juice
1 cup milk
2 tablespoons brown sugar
2 teaspoons vanilla
1 teaspoon cinnamon
1/4 teaspoon baking powder
4 large egg whites
1 loaf French bread

Cut into 1 1/2 inch slices. Make slit to form pocket. Stuff with mashed bananas mixed with lemon juice.

Arrange bread in 9x13 pan. Whisk milk, brown sugar, vanilla, cinnamon, baking powder, and eggs, then pour over bread. Chill for at least 45 minutes {or overnight}, turning bread pieces over halfway through marinating time.

When ready to cook, melt 1-2 tsp butter/margarine {I used coconut oil} in skillet over med heat. Cook each 3 min on each side. Serve with maple syrup.

Note: I bet you could leave these in the 9x13 pan and bake them. I would try baking at 375 for 25 minutes and add more time if you need!

Wednesday, April 2, 2014

Vanilla Banana Muffins

Thanks to Aunt Kate for these awesome muffins! They are delicious! I would love to try them with whole wheat flour, but they were actually very good this way. They were the perfect consistency for a muffin. Seriously perfect! And the muffin tops were amazing {as per usual}.
Sugar Spot Banana Muffins Recipe
Photo Credit to Karry Hosford
Vanilla Banana Muffins
Makes about 36 muffins
4 cups flour
2 teaspoons baking soda
1/2 teaspoon salt
2 1/2 cups sugar
1 cup butter/margarine
4 eggs
1 cup sour cream
4 teaspoons vanilla
1/2 cup vanilla yogurt
6 mashed bananas
Optional:
1 cup frozen blueberries, chocolate chips, nuts, etc!

Preheat oven to 400 degrees.
Mix dry ingredients and wet ingredients separately. Add them together and lightly combine. Grease muffin tins {or place paper muffin holders in a muffin tin}. Fill each one completely, until it looks like it's going to overflow…it won't! Bake for 13-15 minutes.

Recipe Source: Kate Kloberdanz via The Dorrity Family Cookbook

Monday, March 31, 2014

Puffy Pancakes with Nutty Banana Butterscotch

Another awesome from my mother in law. I love her recipes because most of the time its just a better
version of what I'm already doing! Like this one. It's simply german pancakes with a delicious banana super sauce on top. So amazing.
Photo Credit to Me (I know, you love the plates…)
Puffy Pancakes with Nutty Banana Butterscotch
1 cup brown sugar
4 tablespoons margarine
1/2 cup sour cream
pinch salt
2 bananas, sliced thin
1/2 cup walnuts, chopped

Make german pancakes. While cooking, heat in saucepan over medium heat the sugar, margarine, sour cream and salt for about 5 minutes. Then add bananas and heat through. Drizzle the sauce over the pancakes and sprinkle with nuts.

Recipe Source: Sharrie Webster

Monday, February 10, 2014

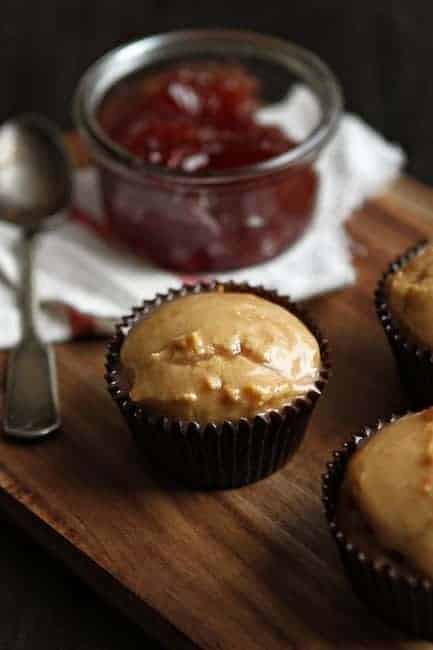
Peanut Butter and Jam Muffins

More peanut butter and jam! Yes please. Also, add more jam than it says because these are delicious, but very very thick, so jam it up!

Post image for Peanut Butter and Jelly Muffins
Photo Credit to My Baking Addiction
Peanut Butter and Jam Muffins
2 cups Gold Medal all-purpose flour
1/2 cup granulated sugar
2 teaspoons baking powder
1 teaspoon salt
1 cup peanut butter, creamy or crunchy
1 large egg
1 cup whole milk
2 teaspoons pure vanilla extract
jelly or jam

Preheat oven to 350 degrees. Line a standard muffin pan with paper liners, or spray each well with nonstick cooking spray.
In the bowl of a stand mixer fitted with the paddle attachment, or in a large bowl with an electric mixer, combine the flour, sugar, baking powder and salt. Add peanut butter, and mix on medium speed until well combined and crumbly.
In a medium bowl, whisk together the egg, milk and vanilla. Add to peanut butter mixture and mix until just combined.
Using a medium cookie scoop (1 1/2 tablespoons) add muffin batter to prepared muffin wells. Next, place 4 teaspoons of your favorite jam or jelly in the center of the muffin batter and top with another scoop (1 1/2 tablespoons) of muffin batter. If necessary, use a spoon or knife to gently spread batter to cover the jam.
Bake in preheated oven for 22-25 minutes.

Recipe Source: My Baking Addiction

Banana Crumb Muffins

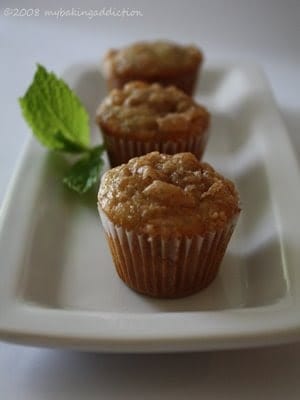
Oh, remember how I love muffins. Here's another one. This is a like a perfect one though. It's pretty light and airy and the banana is so delicious. I think that if I do make the crumb topping again though, I will cut the ingredients in half to make is less sugary. That might sound weird, but I don't love how sugary/crunchy the top was. Delicious though!
Post image for My Favorite Banana Crumb Muffins
Photo Credit to My Baking Addiction
Banana Crumb Muffins
1 1/2 cups all-purpose flour
1 teaspoon baking soda
1 teaspoon baking powder
1/2 teaspoon salt
3 large bananas, mashed
3/4 cup white sugar
1 egg, lightly beaten
1/3 cup butter, melted
1/2 teaspoon cinnamon

Crumb Topping: {I will half this next time}
1/3 cup packed brown sugar
2 tablespoons all-purpose flour
1/8 teaspoon ground cinnamon
1 tablespoon butter
Preheat oven to 375°F (190°C). Lightly grease 10 muffin cups, or line with muffin papers.

In a large bowl, mix together 1 1/2 cups flour, baking soda, baking powder and salt.
In another bowl, beat together bananas, sugar, egg and melted butter. Stir the banana mixture into the flour mixture just until moistened. Spoon batter into prepared muffin cups.
In a small bowl, mix together brown sugar, 2 tablespoons flour and cinnamon. Cut in 1 tablespoon butter until mixture resembles coarse cornmeal. Sprinkle topping over muffins.
Bake in preheated oven for 18 to 20 minutes, until a toothpick inserted into center of a muffin comes out clean.

Recipe Source: My Baking Addiction

Saturday, February 8, 2014

Omelette in a Bag

Omelettes are delicious but I hate cooking them. I'm really awful at it. But eggs with tomatoes, mushrooms, avocados, cheese, ham, bacon….the list gets longer and I get happier. This is an awesome way of doing it. Super simple, everyone can make their own at the same time, and it's a great way of making them while camping!
Omelette in a Bag - how to
Photo Credit to Favorite Family Recipes

Omelette in a Bag
2 eggs {Yes, two eggs is enough for one omelette}
1 Tbsp. water

additional ingredients (to your liking):
cheese, shredded
ham, diced
bacon, cooked & chopped
sausage, cooked & crumbled
tomato, diced
bell peppers, diced
onion, chopped
mushroom, sliced
(whatever other toppings you like)

Optional Toppings:
Salt & pepper
Sour cream
salsa
avocado
guacamole
(any additional topping ingredients you like)

Bring a large pot of water to a boil (appx. 2/3 full)
While waiting for the water to boil, crack eggs into a Ziploc heavy-duty, large (at least quart-sized.. preferably gallon-size) freezer bag and add water.
Seal and shake, smash, squish the bag... whatever you can to get those eggs really beaten up.
Add any remaining ingredients that you would like, press as much air out of the bag as you can and seal tightly. Smoosh the ingredients around a little bit to get an even distribution.
Place bags (up to 6) in the boiling water and cook for 13 minutes (adding 1-2 minutes per additional egg if people want bigger omelettes). Make sure the tops of the bag don't hang out over the edge of the pot, especially if you are doing it over a fire-- you don't want the plastic to melt.
Carefully remove the bags from the water. When you open the bag, the omelette should easily slide onto the plate. 

Recipe Source: Favorite Family Recipes

Peanut Butter and Jam Skillet Monkey Bread

You can never go wrong with peanut butter and jam. Never. Seriously I love the combination so much. Yeah, I'm pretty sure I've said this before, but I used to mix peanut butter and jam for a snack. Then, my roommates would get mad that I left it in the fridge and it looked gross. Not gross, amazing. So these are wonderful and beautiful.

Photo Credit to Picky Palate

Peanut Butter and Jam Skillet Monkey Bread
1 can Refrigerated Biscuits, 8 count (I used the Simply line from Pillsbury)
1/4 cup butter, melted
1/4 cup granulated sugar
1/4 cup creamy peanut butter, warmed in microwave until liquid like {I probably used more…double?}
1/2 cup jelly of choice, warmed in microwave until liquid like {Also, used just a little more}
4 tablespoons heavy cream
1/2 cup powdered sugar

Preheat oven to 350 degrees F. and spray 9-inch cast iron skillet with non-stick cooking spray.
Cut each biscuit into fourths. Place melted butter into a large ziplock bag and toss in cut biscuits. Shake around to coat then toss in sugar, mixing to combine. Pour into prepared 9-inch cast iron skillet and drizzle warmed peanut butter and jelly over top. Bake for 18-22 minutes or until cooked through and golden.
Whisk the heavy cream and powdered sugar until combined then drizzle over warm biscuits. Serve warm.

Recipe Source: Picky Palate

{Overnight} Cream Cheese-Stuffed Lemon French Toast with Strawberries

Lemon and strawberry is one of my newfound favorite combination of flavors. Remember this jello salad? I made one with strawberry jello instead of orange and shabam! So delightful. So yes, you will love this and I love it. Just make sure you get lots of strawberries, because you will want more and more.
Photo Credit to Our Best Bites
{Overnight} Cream Cheese-Stuffed Lemon French Toast with Strawberries
6 large, stale butter croissants {I used 10-ish small croissants}
1 8-ounce package cream cheese
1 1/4 cups powdered sugar, divided
2 lemons
1 1/4 teaspoons lemon extract
2 eggs
1 1/2 cups milk
Strawberry Sauce
Sliced fresh strawberries (about 2 cups)
Sweetened Whipped Cream (optional) {I used cool whip}

Slice the croissants in half lengthwise. Set aside.

In a medium mixing bowl, combine the cream cheese, zest of one lemon, strained juice of one lemon (about 1 1/2-2 tablespoons){I did not strain mine}, and 3/4 cup powdered sugar. Mix with an electric mixer until light and fluffy.

Spread the lemon cream cheese mixture over the bottoms of the croissants and then replace the tops, pressing down to flatten. Cut into halves (or even fourths if necessary) and arrange the pieces evenly in a 9×13″ pan lightly sprayed with nonstick cooking spray.

Whisk together the milk, eggs, lemon extract, zest from the second lemon, and remaining 1/2 cup of powdered sugar. Pour evenly over the croissants and cover with aluminum foil. Refrigerate for 8-10 hours.

When ready to bake, preheat oven to 350. Bake covered for 30 minutes and then remove the foil and bake for another 20-30 minutes or until the croissants are golden brown and the liquid is absorbed. Remove from the oven and allow it to stand for 5-10 minutes. Cut into squares and top individual servings with Strawberry Sauce, fresh sliced strawberries, and, if desired, sweetened whipped cream. 

Recipe Source: Our Best Bites

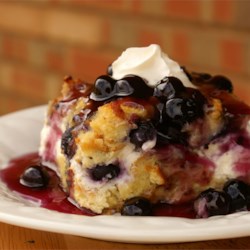
{Overnight} Blueberry French Toast

I'm pretty sure that I've said before {possibly more than once} that I love overnight breakfast stuff. This is one of my faves. Blueberries and cream cheese?! Have mercy! Yes, it is heavenly. I've made it with the blueberry dressing and also just used cream syrup. The blueberry syrup is really good but is extremely blueberry-y.
Overnight Blueberry French Toast Recipe
Photo Credit to allrecipes.com
{Overnight} Blueberry French Toast
12 slices day-old bread, cut into 1-inch cubes
2 (8 ounce) packages cream cheese, cut into 1 inch cubes
1 cup fresh blueberries
12 eggs, beaten
2 cups milk
1 teaspoon vanilla extract
1/3 cup maple syrup
1 cup white sugar
2 tablespoons cornstarch
1 cup water
1 cup fresh blueberries
1 tablespoon butter

Lightly grease a 9x13 inch baking dish. Arrange half the bread cubes in the dish, and top with cream cheese cubes. Sprinkle 1 cup blueberries over the cream cheese, and top with remaining bread cubes.
In a large bowl, mix the eggs, milk, vanilla extract, and syrup. Pour over the bread cubes. Cover, and refrigerate overnight.
Remove the bread cube mixture from the refrigerator about 30 minutes before baking. Preheat the oven to 350 degrees F.
Cover, and bake 30 minutes. Uncover, and continue baking 25 to 30 minutes, until center is firm and surface is lightly browned.
In a medium saucepan, mix the sugar, cornstarch, and water. Bring to a boil. Stirring constantly, cook 3 to 4 minutes. Mix in the remaining 1 cup blueberries. Reduce heat, and simmer 10 minutes, until the blueberries burst. Stir in the butter, and pour over the baked French toast

Recipe Source: Allrecipes.com

Whole Grain Banana Chocolate Chip Muffins

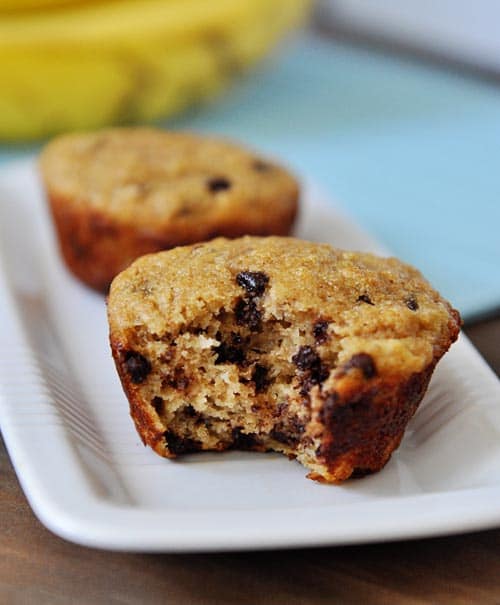
I love muffins. I really don't know what it is about muffins, but I have this love affair with them and I feel like I can never have too many. Part of it is probably the face that you can freeze muffins and keep them for awhile. I love making then freezing breakfast food. These are awesome and are probably my kids favorite muffins.
Whole Grain Banana Chocolate Chip Muffins
Photo Credit to Mel's Kitchen Cafe
Whole Grain Banana Chocolate Chip Muffins
2 average-sized bananas, peeled and mashed
1/3 cup packed light brown sugar (optional)
1/2 cup plain yogurt
1 large egg
1/2 cup unsweetened applesauce
1 1/2 cups whole wheat flour
1 teaspoon baking powder
1/2 teaspoon baking soda
1/4 teaspoon salt
1/3 to 1/2 cup mini chocolate chips

Preheat the oven to 375 degrees F. Lightly grease a 12-cup muffin tin or line with cupcake liners (lightly grease the muffin liners if using).
In a large bowl, whisk together the bananas, sugar, yogurt, egg, and applesauce.
In a small bowl, combine the flour, baking powder, baking soda, salt and chocolate chips.
Fold the dry ingredients into the wet ingredients and stir just until combined. Don't overmix.
Spoon the batter evenly into the muffin cups. Bake for 16-18 minutes until a toothpick inserted in the center of a muffin comes out clean.
Remove the muffins from the tin and let them cool completely on a wire rack.
Recipe Source: Mel's Kitchen Cafe

Ham & Cheese Soufflé Roll

Never had I had a soufflé roll before January. And now, I have. And is my life better? Yes, yes I would say it is. Much better in fact. I can't even imagine a chocolate soufflé, but it makes me super excited because this ham & cheese one rocked my world.
Photo Credit to Our Best Bites
Ham & Cheese Souffle Roll
4 Tbs butter (this is for the actual recipe. Use additional butter for greasing pan)
1/2 C flour
1/8 tsp black pepper
2 C milk
6 egg yolks, lightly beaten
6 egg whites
1/4 tsp cream of tartar
6 oz thinly sliced ham (go to the deli counter and ask for thin slices)
6 oz thinly sliced Swiss or porvolone cheese
Sauce- see options at end.
Parchment paper

Preheat oven to 375 F. Line a 15x10x1 inch baking pan with foil (a large rimmed baking sheet) extend foil about 1 inch over edges of pan. Grease well with butter and lightly flour the foil.

In a medium saucepan melt 4 Tbs butter. Stir in flour and pepper. Gradually and slowly stir in milk while whisking to remove lumps. Cook and stir until mixture is thickened and bubbly; cool slightly. Place egg yolks in a medium bowl; gradually stir in milk mixture. In a large bowl beat egg whites and cream of tartar with an electric mixer until stiff peaks form (tips stand straight.) Fold some of the beaten egg whites inot the egg white mixture. Fold egg yolk mixture into the remaining beaten egg whites. Spread in the prepared baking pan.

Bake about 20 minutes or until souffle is puffed and a knife inserted in center comes out clean.

Meanwhile, place a long sheet of parchment paper on a large baking sheet. After baking souffle immediately loosen edges of souffle from baking pan.  Invert soufflé onto the parchment-lined baking sheet. Carefully peel off parchment.

Place ham and cheese slices in single layers on top of souffle. Starting from a short side, use parchment on baking sheet to lift and help roll up souffle. Don’t roll the paper inside. Use it to lift soufflé roll onto another flat baking sheet. Cover souffle with foil and chill for 2-24 hours.

Before serving, preheat oven to 350. Bake souffle roll, covered with the foil, about 45 minutes or until heated through. To serve, uncover and transfer souffle roll to a warm serving platter (a giant spatula works well, you can sort of slide the whole roll while helping it with the spatula). If desired, spoon a little sauce over the top. Slice with a serrated knife; serve with remaining sauce. If desired, garnish with snipped parsley.

BHG Parsley Sauce {This is the one we used and it was awe.some.}: In a blender or food processor combine 1/2 C ligthly packed fresh parsley sprigs; 2 green onions, cut up; and 1 tsp dry basil. Cover and blend or process until finely chopped. Add 1 1/2 C whipping cream, 1 Tbs cornstarch, 1 Tbs dijon mustard, and 1/4 tsp salt. Cover and blend or process for 10-20 seconds or until mixture is slightly thickened. Don’t over process, or you’ll make butter! You can make to this point ahead of time and store in fridge. When ready to serve, shake sauce; transfer to a medium saucepan, and cook while stirring over medium heat until thickened and bubbly. Cook and stir for 2 minutes more.

Low-Cal Parsley Sauce: For these photos I made my own, lighter version of this sauce by making my Guiltless Alfredo Sauce. Decrease milk to 1 1/2 C and to the blender mixture add 1/2 C roughly chopped parsley, 1 tsp dried basil, 2 green onions (roughly chopped), and 1 Tbs dijon mustard. Follow the rest of the recipe as directed.

Recipe Source: Our Best Bites

*Note: Click on the above link at Our Best Bites for wonderful "how to" photos