Showing posts with label Cake. Show all posts

Sunday, April 26, 2015

Carrot Cake Cream Cheese Swirl Bundt Cake

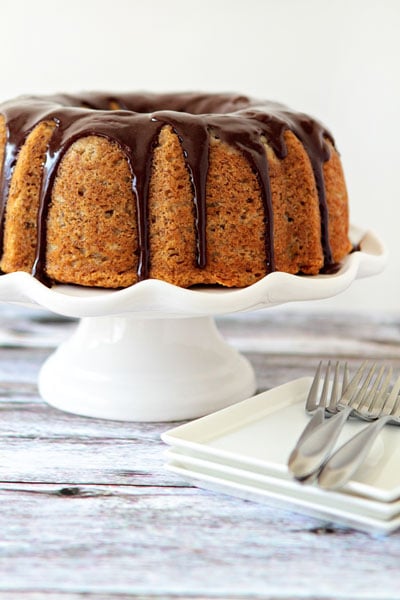
Holy moly deliciousness. Mel has done it again. This time with carrot cake/cheesecake perfection.
Carrot Cake Cream Cheese Swirl Bundt Cake
Photo Credit to Mel's Kitchen Cafe
Carrot Cake Cream Cheese Swirl Bundt Cake
Carrot Cake:
1 2/3 cup (8 1/2 ounces) all-purpose flour
1 teaspoon baking powder
3/4 teaspoon baking soda
1/2 teaspoon ground nutmeg
1 1/2 teaspoons ground cinnamon
1/2 teaspoon salt
3-4 large carrots (12 ounces), ends trimmed and finely shredded (about 2 cups)
3 large eggs
1 cup granulated sugar (7 ounces)
1/2 cup packed light brown sugar (3 1/2 ounces)
1 cup oil (see note above)
1/2 cup toasted, chopped pecans, optional
Cream Cheese Filling:
8 ounces cream cheese, light or regular, softened
1/4 teaspoon vanilla extract
1/4 cup granulated sugar
1 large egg
Frosting:
4 ounces cream cheese, softened
2 tablespoons butter, softened
1/2 teaspoon vanilla extract
2 tablespoons heavy cream
1 tablespoon sour cream
2 cups powdered sugar

DIRECTIONS
Preheat the oven to 350 degrees F. Grease a 9- or 10-inch bundt cake pan very well, getting in all the nooks and crannies. Lightly dust with flour, tapping out the excess, and set aside.
For the cake batter, in a medium bowl, whisk together the flour, baking powder, baking soda, nutmeg, cinnamon and salt. Set aside.
In a large bowl (you can use the bowl of a stand electric mixer here), with a handheld electric mixer, beat the eggs and sugars together until blended. With the mixer running, drizzle in the oil and mix until thick and creamy.
Add the dry ingredients, carrots and pecans, and mix gently by hand until combined and no streaks of flour remain. Set aside for a few minutes while preparing the cream cheese filling.
For the cream cheese layer, beat together the cream cheese, vanilla, sugar and egg until smooth and well-combined. You can use an electric mixer or I generally use my blender (Blendtec model) for whipping this together.
Pour half of the batter evenly into the prepared pan. Spoon the cream cheese mixture in dollops evenly across the top. Finish with the remaining carrot cake batter. It's ok if you can see the cream cheese layer peeking through - the carrot cake may not cover it all the way.
Bake the cake for 45-60 minutes until the top lightly springs back to the touch and a toothpick inserted in the cake comes out clean.
Remove fron the oven and let sit for 5-10 minutes before turning out onto a serving plate to cool completely.
For the frosting, whip together the cream cheese, butter, and vanilla until smooth and well-combined (again, I use my blender for this but you can use an electric mixer). Add the heavy cream, sour cream and powdered sugar and mix until light and fluffy.
Once the cake is completely cooled, spread the frosting over the top curve of the bundt cake. If you want to cover the cake entirely, you can double the frosting.
Refrigerate until ready to serve. The cake can be made, frosted and refrigerated up to a day in advance.

Recipe Source: Mel's Kitchen Cafe

Saturday, April 25, 2015

Strawberry Cream Puff Cake

Oh man, the orange in this cake was so delicious. I loved it!
Strawberry Cream Puff Cake
Photo Credit to Mel's Kitchen Cafe


Strawberry Cream Puff Cake
Cream Puff Base:
5 tablespoons butter
2/3 cup water
1 tablespoon sugar
2/3 cup flour
3 eggs
Cream Cheese Mixture:
4 ounces cream cheese, softened
1 teaspoon fresh orange zest
1/2 teaspoon vanilla
1 cup heavy whipping cream
2/3 cup powdered sugar
1-1.5 clam shell strawberries {mixed with sugar and let sit}

For the cream puff layer, preheat the oven to 375 degrees. Bring the butter, water and sugar to a boil in a medium saucepan. Add the flour all at once and stir quickly until the mixture pulls away from the sides of the pan. Remove the pan from the heat and stir the mixture until smooth. Let cool for 5 minutes. Add the eggs one at a time and beat until the mixture is shiny with a satiny sheen. Don’t overbeat. Lightly grease the bottom and sides of a 9-inch springform pan (or in a pinch, you could use a 9-inch circle cake pan). Using an offset spatula, spread the mixture on the bottom and one inch up the sides of the prepared pan. Bake for 25 minutes. Remove from the oven and prick pastry with a toothpick 10-12 times. Return to the oven and bake 5-10 minutes more until golden brown but not overbaked (you can insert a toothpick into the center and if it comes out with sticky dough, it still needs longer in the oven). Cool completely.
For the cream cheese mixture, beat the cream cheese until smooth. Gradually add the powdered sugar (if you want to ensure there are no lumps, sift the powdered sugar into the cream cheese) and beat with the cream cheese until mixture is smooth and light. Add the remaining ingredients and beat until stiff peaks form. Spread onto the cooled cream puff shell.
Top with strawberries, or you can use a 16-ounce bag of frozen strawberries that have been thawed. Mix the thawed strawberries and juice with 1-2 teaspoons sugar and bring to a simmer in a saucepan. Cook until slightly thickened. Cool completely and use as topping for the cake.

Recipe Source: Mel's Kitchen Cafe

Tuesday, April 21, 2015

Moist White Cake

I made this for my mother to take to a young women function, and it only got rave reviews!!
The Perfect Homemade White Cake
Photo Credit to I am Baker
Moist White Cake
2 c. flour
2 tsp. baking powder
1/2 tsp. salt
1/2 c. shortening
2 eggs
1 1/2 c. sugar
1 tsp. vanilla extract {or1 1/2, I don't really measure}
1 1/4 c. milk
Preheat oven to 350°F.
Mix shortening, eggs, sugar, vanilla, and milk. Then mix flour, baking powder and salt in another bowl. Then add dry ingredients to other mixture. Pour into a well-greased 9 x 12 pan.
Bake at 350°F for 30-35 minutes.

Recipe Source: Cooks.com

Saturday, March 8, 2014

Rhubarb Streusel Cake with Warm Vanilla Sauce

So one of the only things my mother-in-law can grow in Birdseye is rhubarb, thanks to the short growing season. So we usually get quite a bit from her. This cake will make me fatter, but will use up all that rhubarb in the most delicious way possible.
Rhubarb Streusel Cake with Warm Vanilla Sauce
Photo Credit to Mel's Kitchen Cafe
Rhubarb Streusel Cake with Warm Vanilla Sauce
2 tablespoons butter, softened
1 cup sugar
1 egg
2 cups all-purpose flour
1 teaspoon baking powder
1/2 teaspoon baking soda
1/2 teaspoon salt
1 cup buttermilk
2 cups chopped fresh or frozen rhubarb

Streusel Topping:
1/2 cup all-purpose flour
1/2 cup sugar
4 tablespoons butter, melted
Vanilla Sauce:
1/2 cup butter
3/4 cup sugar
1/2 cup evaporated milk
1 teaspoon vanilla extract

Preheat the oven to 350 degrees. Lightly grease a 9-inch square baking dish and set aside.
In a large mixing bowl, cream together the butter and sugar for the cake. Beat in the egg. In a smaller bowl, whisk together the flour, baking powder, baking soda and salt. Add the dry ingredients to the creamed butter/sugar mixture alternately with the buttermilk, beating just until moistened. Fold in the chopped rhubarb. Pour the batter into the prepared pan and smooth the batter to the edges.
In a medium bowl, combine the streusel topping ingredients, mixing them together until the mixture is coarse and combined. Sprinkle the streusel evenly over the batter. Bake for 40-45 minutes or until a toothpick comes out clean and the top of the cake is lightly browned. Cool on a wire rack.
For the sauce, melt butter in a medium saucepan. Add the sugar and milk. Bring to a boil; cook and stir for 2-3 minutes or until slightly thickened (it will thicken more as it cools slightly). Remove from the heat; stir in the vanilla. Serve warm with the cake.

Recipe Source: Mel's Kitchen Cafe

Wednesday, November 20, 2013

{Healthy-ish} Chocolate Zucchini Cake

I was quite skeptical about this. I mean, I really wanted to try it, but I was worried that it was going to be "too healthy." Luckily it was healthy and delicious {although I added ice cream to every bite, so that might've had something to do with it…}
100% Whole Wheat Chocolate Zucchini Cake  Greek Yogurt Chocolate Ganache - moist, chocolately and made healthier! | texanerin.com
Photo Credit to Texanerin.com
{Healthy-ish} Chocolate Zucchini Cake
Zucchini cake:
¾ cup olive oil or canola oil
1 cup honey
2 teaspoons vanilla extract
2 large eggs
¾ cup Greek yogurt
2-2 1/4 whole wheat flour
1¼ teaspoon baking soda
½ teaspoon baking powder
½ teaspoon salt
3/4 cup cocoa powder
3 cups grated, peeled zucchini {I didn't peel at all}
1 cup semi-sweet chocolate chips

Ganache:
¼ cup honey
3½ tablespoons coconut oil
½ teaspoon vanilla
¼ cup Dutch-process cocoa powder
2-4 tablespoons Greek yogurt

Grease a 12 cup bundt pan or 6 cup if you want to make half. Preheat your oven to 350°F / 176°C. For the cake, combine the honey, oil, and vanilla in a large bowl. At first it'll be difficult to get the honey incorporated, but it'll work. Stir in the eggs and then the Greek yogurt. Set this bowl aside.
In another large bowl, combine all the dry ingredients. Sift the cocoa powder into the bowl if it's lumpy, or just use a fork to get rid of the lumps. Add the wet mix to the dry mix and stir, just until combined. 

Fold in the zucchini and the chocolate chips.
Bake the full recipe for 40 minutes, or if using half, bake for 30 minutes. When you insert a toothpick in the middle, the toothpick will not come out dry, or even with crumbs, but it'll come out covered in sticky batter. If you insert it, and it's just normal batter, it's not ready. Sticky batter is what we're looking for! It'll continue to cook once it's out of the oven.
Let cool in the pan for 10 minutes and then flip out onto a wire rack to cool. Cool completely before putting on the ganache. If using the following ganache recipe, store cake covered in the fridge. Otherwise, room temperature is fine.
For the ganache: Over low heat, melt the honey and coconut oil and in a medium saucepan or pot. When melted, add the vanilla and then the cocoa powder. Stir until thoroughly combined. It might look weird, like it isn't combining. The first time I made it, I used too much coconut oil and poured some out and everything was fine. The recipe reflects how I made it the second time with less coconut oil, and had no problem with excess oil.
Place in the fridge for 5 minutes. Take out and add a tablespoon of Greek yogurt at a time, stirring after every one. For me, just under three tablespoons was enough. It should be pourable at this point. Not too hot and not too cold. Pour over the cake and store any leftovers in the fridge. {I liked it best stored in the fridge for one or two days}

Recipe Source: Texanerin Baking

Thursday, April 4, 2013

Red Velvet Cheesecake Cake

Thank Heaven for birthdays and people requesting me to make deliciousness. It was my MIL's birthday a couple of weeks ago. She requested that I make something. Anything. That's hard for me. Do you know how many desserts I pin on pinterest? {I limit myself to 300 in case you were wondering}.
I narrowed it down to 11, then 7, then 3. I couldn't go any further, so I had Scott pick one. He said {and I quote} "I don't really like red velvet, but lets do this one because the others don't look good to me." 
melskitchencafe.com: Red Velvet Cheesecake Cake
Photo Credit to Mel's Kitchen Cafe
Say Whaaa?
He's not picky. He almost never has an opinion because he likes everything. Oh no...I'm married to a crazy person. Don't get me wrong, I love him. But who doesn't like red velvet? {Oh, that's right, my husband} It's like the light chocolate of the gods.
Don't worry, friends. I don't let that stop me from making all the red velvet flavored goodies I can find. {Sigh of relief}
So...add cheesecake to the wonderfulness of red velvet and you get this decadent, surprisingly-not-too-rich cheesecake cake that takes you away from whatever earthly ridiculousness you are going through and gives you a moment in Heaven.
{Does that make you want to try it. No? Then make it now! Or else!}
Disclaimer: It has a lot of steps...not hard, just a lot. But all of them can be completed a couple of days beforehand, so just plan ahead.
Photo Credit to Me
Red Velvet Cheesecake Cake
Cheesecake Layer:
2 (8-ounces each) packages cream cheese, at room temperature
2/3 cup granulated sugar
pinch of salt
2 large eggs
1/3 cup sour cream
1/3 cup heavy whipping cream
1 teaspoon vanilla extract
Red Velvet Cake Layer:
2 1/2 cups all purpose flour
1 1/2 cups granulated sugar
3 tablespoons natural, unsweetened cocoa powder (not Dutch-process)
1 1/2 teaspoons baking soda
1 teaspoon salt
2 large eggs, at room temperature
1 1/2 cups vegetable or canola oil
1 cup buttermilk
1/4 cup (two 1-ounce bottles) red food coloring
2 teaspoons vanilla extract
2 teaspoons white vinegar
Cream Cheese Frosting:
2 (8-ounces each) packages cream cheese, at room temperature
1/2 cup (8 tablespoons) butter, at room temperature
1 teaspoon vanilla extract
2 1/2 cups powdered sugar

Make the cheesecake layer first so it has time to chill while the cake and frosting are being prepared. Preheat the oven to 325 degrees F. Lightly coat a 9-inch springform pan with nonstick spray. In a large bowl with a handheld electric mixer or in the bowl of an electric stand mixer, whip the cream cheese until it is smooth and creamy. Mix in the sugar and salt and blend for 2 minutes, scraping down the sides of the bowl as needed. Add the eggs, one at a time, blending after each addition. Mix in the sour cream, whipping cream and vanilla and beat until smooth. Don't overbeat - just mix until smooth and creamy. Pour the batter into the prepared pan. Bake the cheesecake for 40-45 minutes until it is set and not jiggly in the middle. Remove the cheesecake from the oven and let it rest on a wire rack until completely cooled. Wrap the pan in foil and place the cooled cheesecake in the freezer until ready to assemble.Note: this cake can be assembled start to finish and refrigerated, well-covered, for up to two days before serving. If you don't have time to make it all at once, the cheesecake layer can be baked, cooled and frozen up to several weeks in advance.

For the red velvet cake, preheat the oven to 350 degrees F. Grease and flour two 9-inch round metal baking pans. In a large bowl, whisk together the flour, sugar, cocoa powder, baking soda and salt. Make a well in the center of the dry ingredients and add the eggs, oil, buttermilk, food coloring, vanilla and vinegar. Whisk until fully combined, and continue whisking for another minute or two until the batter is thick and smooth, scraping down the sides as necessary. Spread the batter evenly into the prepared pans, dividing equally. Bake for 28-30 minutes, until a toothpick inserted in the center comes out with a few moist crumbs attached (don't overbake or the cake layers will be dry). Let the cakes cool in the pans for 5-10 minutes. Run a knife around the edge of the pans, then invert cakes onto a piece of parchment or wax paper set on a cooling rack. Let them cool completely.

Prepare the frosting, by whipping the cream cheese with an electric handheld mixer in a large bowl or in the bowl of an electric stand mixer until smooth and creamy. Add the butter and vanilla and mix. Gradually add the powdered sugar and mix on high speed until it is light and fluffy and creamy.
To assemble, cut each of the cake layers in half to form two thinner cake layers (so you'll have four thin cake layers total). Place one of the bottom halves in the middle of a serving platter or cake plate. Remove the cheesecake from the freezer. Gently loosen it from the sides and bottom of the pan with a flat knife/spatula that has been run through hot water (this will help loosen it from the pan). When removed, lay the cheesecake layer on top of the red velvet cake layer on the serving plate. Place another red velvet cake layer on top of the cheesecake. Try to choose the layers that are the flattest on top and bottom so that the cake, when frosted, doesn't tilt or look like it is uneven. Crumble the remaining two cake layers into small crumbs and set aside.

Frost the cake by scooping dollops of the frosting on top of the cake and using an offset spatula, spread the frosting over the tops and sides. The sides will be covered up with cake crumbs so they don't need to be perfectly frosted - just make sure there is an even layer of frosting so the cake crumbs can adhere to the cake. Swirl the frosting across the top. Carefully gather handfuls of cake crumbs and press them into the sides of the cake. You'll have a mess, but don't worry, it is easy to gently sweep the fallen cake crumbs out of the way. Keep pressing them to the sides until the entire perimeter of the cake is completely covered.
Cover the cake lightly (or else the cake crumbs on the side will dry out) and refrigerate until ready to serve. The cake can be made up to two days in advance and chilled until serving.

Note: If you don't have time to make it all at once, the cheesecake layer can be baked, cooled and frozen up to several weeks in advance.
Also, I was worried that all of the frosting would make it too rich, so I only used 2/3-3/4 of it, but I think I was mistaken. Next time I will definitely try it with all the frosting. If you do, let me know how it is!

Recipe Source: Mel's Kitchen Cafe

Friday, March 22, 2013

Peanut Butter Cup Cake

We've all (me...) have read about how much I love peanut butter. Especially when there are ridiculous amounts of chocolate involved. Well...this is one recipe that I will make over and over again. It is too awesome to describe. Just imagine your favorite dessert with chocolate and peanut butter, multiply it's deliciousness by 200...and you have this. Ah-mazing.
reese's peanut butter-cake-recipe 09
Peanut Butter Cup Cake
FILLING:
8oz semi-sweet chocolate, roughly chopped
8oz heavy cream
1/2 cup creamy peanut butter
1/2 cup Reese's peanut butter cups, roughly chopped

Heat the cream until it just begins to boil. Pour it over the chocolate in a medium bowl. Whisk until the chocolate melts, then whisk in the peanut butter until it's all incorporated and smooth. Set aside 1/4 of the filling for the first layer of frosting. Cool the other 3/4 completely, then gently stir in the peanut butter cups.

FROSTING:
1/2 cup creamy peanut butter
1/2 cup butter, at room temperature
2 tsp vanilla extract
2 cups powdered sugar

Cream together the butter and peanut butter. Add the vanilla, then the sugar. I beat mine until it was pretty fluffy.

I used the chocolate cake from my blog that I love!

ASSEMBLY:
Place one 9-inch round on a cake stand or plate. Cover the top in the peanut butter fudge filling. Place the second 9-inch round on top. Using the reserved filling, spread a thin layer on the outside of the cake. Refrigerate until the fudge is set and firm to the touch.

Slather the whole thing in the peanut butter frosting. Decorate with peanut butter cups.


Sunday, December 16, 2012

Peanut Butter Silk Cake

Peanut Butter Silk Cake
Photo Credit to bettycrocker.com
This was one of my first attempts at anything but a 9x13 shaped cake. I know, it was a few years ago. But I've made it a couple more times, because it is SO good. (Of course you know how partial I am to peanut butter) It's moist, delicious and heavenly. Sometimes I judge Betty Crocker...sorry Betty. I'm not even sure why, maybe I think they're too easy (because I'm dumb enough to want "challenging" recipes), or maybe I don't like them because I like to make everything from scratch (yeah, that dumb thing in me again). Anyway...this is a recipe that proves me wrong. Try it.

Peanut Butter Silk Cake
1 box yellow cake mix
1 1/4 cups water
1/2 cup creamy peanut butter
1/3 cup vegetable oil
3 eggs
1/4 cup butter or margarine
1/4 cup packed brown sugar
1 cup whipping cream
1/2 cup creamy peanut butter
1 container (1 lb) chocolate frosting (or one recipe chocolate frosting...still haven't found one I love)
1 cup chopped peanuts, if desired

Heat oven to 350°F (or 325°F for dark or nonstick pans). Generously grease bottoms only of 2 (8- or 9-inch) round cake pans with shortening or cooking spray.
In large bowl, beat cake mix, water, 1/2 cup peanut butter, the oil and eggs with electric mixer on low speed 30 seconds. Beat on medium speed 2 minutes, scraping bowl occasionally. Pour into pans.
Bake 30 to 35 minutes or until toothpick inserted in center comes out clean. Cool 10 minutes. Run knife around sides of pans to loosen cakes; remove from pans to cooling rack. Cool completely, about 1 hour.
In 2-quart saucepan, melt butter over medium heat; stir in brown sugar. Heat to boiling; boil and stir 1 minute. Remove from heat. Refrigerate 10 minutes.
In chilled medium bowl, beat whipping cream on high speed until soft peaks form; set aside. In another medium bowl, beat 1/2 cup peanut butter and the brown sugar mixture on medium speed until smooth and creamy. Add whipped cream to peanut butter mixture; beat on medium speed until mixture is smooth and creamy.
Split each cake layer horizontally to make 2 layers. Fill each layer with about 2/3 cup peanut butter mixture to within 1/2 inch of edge. Frost side and top of cake with frosting. Press peanuts onto frosting on side of cake. Store covered in refrigerator.

Note: I like a little more peanut butter filling, so I double that part of the recipe, then add whatever I feel like. And whatever I have left over...I might eat the extra on its own...

Recipe Source: Adapted from Betty Crocker

Saturday, December 8, 2012

Pumpkin Cinnamon Roll Sheet Cake

I got this ready in about 10 minutes. Completely. Awesome, right? I love that you don't have to soften butter. Sometimes I decide I want a dessert, and I have about 30 minutes to make and eat it. This was awesome. More moist than I could have imagined. And it was so delicious! We ate a lot of pieces in a little...a very little! Try it.
Photo Credit to picky-palate.com
Pumpkin Cinnamon Roll Sheet Cake
Makes 16-20 pieces1 box yellow cake mix
4 eggs
1/2 cup canola or vegetable oil
1/2 cup milk or buttermilk
3.4 ounce box Vanilla Instant Pudding Mix
1/2 cup sour cream
15 ounce can pumpkin
1 stick (8 tablespoons) unsalted butter
3/4 cup packed light brown sugar
1/2 teaspoon ground cinnamon
3/4 cups powdered sugar
1/4-1/2 cup heavy cream (start w 1/4 cup and add a little more cream if needed)

Preheat oven to 350 degrees F. and spray a jelly roll pan with non stick cooking spray.

Place cake mix, eggs, oil, milk, pudding, sour cream and pumpkin into a stand or electric mixer, beating until well combined, about 1 1/2 minutes. Pour into prepared pan, spreading evenly.

Place butter into a microwave safe bowl and melt, about 30-40 seconds. Add brown sugar and cinnamon to bowl, mixing until combined. Drizzle mixture evenly over cake then take a knife and run it through to swirl.

Bake cake for 30-35 minutes, until cooked through and remove. Place powdered sugar and cream into a large bowl and mix until creamy and smooth. Drizzle over warm cake then let cool for 20 minutes before cutting into squares. Refrigerate if not serving same day. Enjoy with milk!
Recipe Source: Picky Palate

Apple-Cream Cheese Bundt Cake

Bundt cakes are ridiculously scrumptious. I love their rich, denseness. I sometimes look up bundt cakes because that's what I feel like {which I also feel like is a little weird...} no matter the flavor. This one is a definite winner. I love cream cheese in anything and little different texture from the apples makes this a favorite bundt.
Apple-Cream Cheese Bundt Cake
Photo Credit to bakedbyrachel.com
Apple-Cream Cheese Bundt Cake
Cream Cheese Filling
1 (8-oz) package cream cheese, softened
1/4 cup (4 tablespoons) unsalted butter, at room temperature
1/2 cup granulated sugar
1 large egg, at room temperature
2 tablespoons all-purpose flour
1 teaspoon vanilla extract

Cake
1 cup finely chopped pecans (plus extra for garnish, optional)
3 cups all-purpose flour
1 cup granulated sugar
1 cup packed light brown sugar
2 teaspoons ground cinnamon
1 teaspoon salt
1 teaspoon baking soda
1 teaspoon ground nutmeg
1/2 teaspoon ground allspice
3 large eggs, lightly beaten
3/4 cup canola oil
3/4 cup unsweetened applesauce
1 teaspoon vanilla extract
3 cups peeled and finely chopped Gala apples (about 2-3 medium apples)

Praline Frosting
1/2 cup packed light brown sugar
1/4 cup (4 tablespoons) unsalted butter
3 tablespoons milk
1 teaspoon vanilla extract
1 cup confectioners’ sugar

Preheat oven to 350 F. Spray a 12 or 14 cup bundt pan with nonstick cooking spray with
flour (the cake will fit in a 12-cup bundt, but just barely).

To make the filling: Add the cream cheese, butter and sugar to the bowl of a stand mixer
fitted with the paddle attachment. Beat on medium speed until well combined and
smooth. Add the egg, flour and vanilla and continue beating just until incorporated. Set
aside.

Place the pecans on a rimmed baking sheet and toaste in the oven for 8-10 minutes, or
just until fragrant. Remove the pan to a wire rack.

In a large bowl, whisk the flour, both sugars, the cinnamon, salt, baking soda, nutmeg and
allspice together. Add the eggs, oil, applesauce and vanilla and mix just until combined
(I started with a whisk and switched to a rubber spatula). Fold in the toasted pecans and
chopped apples until distributed throughout the batter.

Spoon about 1/2 to 2/3 of the cake batter into the prepared pan. Top evenly with the
cream cheese filling, leaving a 1-inch border around the edge of the pan (I found this
tricky, just do the best you can). Use a thin paring knife to swirl the cream cheese filling
with the cake batter just a few times – less is more. Top the filling with the remaining
cake batter.

Bake for 60-75 minutes, or until a thin knife inserted in the center of the cake comes out
clean. Transfer the pan to a wire rack and cool for 15 minutes, then invert the cake onto
the rack and allow to cool completely (at least 2 hours).

To make the frosting: Combine the brown sugar, butter and milk in a 2-qt saucepan. Set
over medium heat, and bring to a boil, whisking almost constantly. Boil for 1 minute,
whisking constantly. Remove the pan from the heat and stir in the vanilla. Whisk in the
confectioners’ sugar, a little at a time, until it is completely incorporated and the frosting
is smooth. Gently stir the frosting until it starts to thicken, then pour it over the cooled
cake. (The frosting will set up quickly, so don’t make it in advance – wait until the cake
has cooled completely.) Garnish with extra pecans, if desired.

Recipe Source: Baked by Rachel 

Tuesday, October 30, 2012

(ATK) Boston Cream Pie

Okay. Whenever you have some time (like lots of time), make this because it is delicious. So freaking delicious. Especially the creamy inside with the deep dark chocolate and the fluffy cake...yeah, heaven, that's right.
I'm much more of a decadent dessert lover than anyone else in my family...so this was awesome!
bostoncreampie
Photo Credit to americastestkitchenfeed.com
Boston Cream Pie
Serves 8-10
Pastry Cream:
2 cups half-and-half
6 large egg yolks
1/2 cup sugar
pinch salt
1/4 cup all-purpose flour
4 tablespoons butter, cut into 4 and chilled
1 1/2 teaspoons vanilla extract
Cake:
1 1/2 cups all-purpose flour
1 1/2 teaspoons baking powder
3/4 teaspoon salt
3/4 cup whole milk
6 tablespoons unsalted butter
1 1/2 teaspoons vanilla extract
3 large eggs
1 1/2 cups sugar
Glaze:
1/2 cup heavy cream
2 tablespoons light corn syrup
4 ounces bittersweet chocolate

For the Pastry Cream: Heat half-and-half in medium saucepan over medium heat until just simmering. Meanwhile, whisk yolks, sugar, and salt in medium bowl until smooth. Add flour to yolk mixture and whisk until incorporated. Remove half-and-half from heat and, whisking constantly, slowly add ½ cup to yolk mixture to temper. Whisking constantly, return tempered yolk mixture to half-and-half in saucepan.

Return saucepan to medium heat and cook, whisking constantly, until mixture thickens slightly, about 1 minute. Reduce heat to medium-low and continue to simmer, whisking constantly, 8 minutes.

Increase heat to medium and cook, whisking vigorously, until bubbles burst on surface, 1 to 2 minutes. Remove saucepan from heat; whisk in butter and vanilla until butter is melted and incorporated. Strain pastry cream through fine-mesh strainer set over medium bowl. Press lightly greased parchment paper directly on surface and refrigerate until set, at least 2 hours and up to 24 hours.


For the Cake: Adjust oven rack to middle position and heat oven to 325 degrees. Lightly grease two 9-inch round cake pans with nonstick cooking spray and line with parchment. Whisk flour, baking powder, and salt together in medium bowl. Heat milk and butter in small saucepan over low heat until butter is melted. Remove from heat, add vanilla, and cover to keep warm.


In stand mixer fitted with whisk attachment, whip eggs and sugar at high speed until light and airy, about 5 minutes. Remove mixer bowl from stand. Add hot milk mixture and whisk by hand until incorporated. Add dry ingredients and whisk until incorporated.

Working quickly, divide batter evenly between prepared pans. Bake until tops are light brown and toothpick inserted in center of cakes comes out clean, 20 to 22 minutes.

Transfer cakes to wire rack and cool -completely in pan, about 2 hours. Run small plastic knife around edge of pans, then invert cakes onto wire rack. Carefully remove parchment, then reinvert cakes.

To Assemble: Place one cake round on large plate. Whisk pastry cream briefly, then spoon onto center of cake. Using offset spatula, spread evenly to cake edge. Place second layer on pastry cream, bottom side up, making sure layers line up properly. Press lightly on top of cake to level. Refrigerate cake while preparing glaze.

For the Glaze: Bring cream and corn syrup to simmer in small saucepan over medium heat. Remove from heat and add chocolate. Whisk gently until smooth, 30 seconds. Let stand, whisking occasionally, until thickened slightly, about 5 minutes.

Pour glaze onto center of cake. Use offset spatula to spread glaze to edge of cake, letting excess drip decoratively down sides. Chill finished cake 3 hours before slicing. Cake may be made up to 24 hours before serving.

Recipe Source: America's Test Kitchen

Saturday, September 29, 2012

Chocolate Shortcakes with Bananas and Caramel

Hey hey hey. Long time no...virtual interaction...(because I'm convinced that I have hundreds of devout readers who just don't comment...)
I have been making treats a lot, and cooking dinner a little (which is pretty normal). So, gear up for a whole bunch of ridiculously delicious desserts that have been tried and tested! First up...
Photo Credit to ourbestbites.com
 This little beauty. W.o.w. I was a little skeptical because of the caramel/banana/chocolate thing for some reason
Chocolate Shortcakes with Bananas and Caramel  
Makes 8 pieces
1 1/2 cups all-purpose flour (about 6 3/4 ounces)
1/2 cup sugar
1/3 cup unsweetened cocoa
1 teaspoon baking soda
1/2 teaspoon baking powder
1/4 teaspoon salt
1/4 cup chilled butter, cut into small pieces
1/2 cup fat-free buttermilk
FILLING:
Fat free caramel topping
1 cup frozen reduced-calorie whipped topping, thawed
1/8 tsp. unsweetened cocoa powder, optional {I left it out}
2 medium bananas, peeled and cut into 1/4-inch-thick slices (about 2 cups)

Preheat oven to 375°. 
To prepare the shortcakes, lightly spoon flour into dry measuring cups; level with a knife. Combine flour, sugar, unsweetened cocoa, baking soda, baking powder, and salt in a large bowl, stirring with a whisk. Cut in 1/4 cup butter with a pastry blender or 2 knives until mixture resembles coarse meal. Add buttermilk; stir just until moist. Knead lightly in bowl 5 to 6 times. Turn dough out onto a lightly floured surface; pat dough into an 8-inch circle on a baking sheet lined with parchment paper. Cut dough into 8 wedges, cutting into, but not through, dough.

Recipe Source: Our Best Bites

Friday, August 24, 2012

Strawberry-Banana Trifle

I made this once, and it was a...home...run! Seriously, it's not too heavy, and made with fruit {Which makes it healthier, right}, and it makes a TON! Try it and you won't be disappointed. {PS...Mallory's favorite}
Strawberry-Banana Trifle
Photo credit to recipe.com
Strawberry-Banana Trifle
2 bananas, peeled
3 egg whites
2 tablespoons oil
1 box (18.25 ounces) white cake mix
Filling and Fruit:
2 boxes (3 ounces each) cook-and-serve vanilla or banana pudding mix {I used instant!}
3-1/2 cups milk
2 bananas, peeled and sliced
2 cups sliced strawberries, plus more for garnish
1 cup heavy cream, whipped with
1 tablespoon sugar

Heat oven to 350 degree F. Line a 13 x 9 x 2-inch baking pan with nonstick foil. Set aside.

Cake: In a mixer, combine 1-1/3 cups water, the bananas, egg whites and oil. Mix until mostly smooth, about 2 minutes. Add cake mix. Beat on low speed for 30 seconds, then increase speed to high and beat 2 minutes. Pour into prepared pan and bake at 350 degree F for 33 to 35 minutes.

Cool cake in pan on a wire rack for 15 minutes, then, using foil, lift cake from pan and cool completely.

Filling and Fruit: Meanwhile, cook pudding mix with milk for 15 to 20 minutes over medium heat, until thickened and bubbly. Transfer to a bowl and refrigerate 30 minutes. {or just make instant}

Trim edges from cooled cake. Cut in half, then cut one half into cubes (about 20). Place in a trifle dish or bowl and press slightly to compress. Spoon 2 cups pudding over cake. Top with 1 sliced banana and 1 cup of the sliced strawberries. Cut second cake half into cubes and continue layering cake, pudding, bananas and strawberries. Top with heavy cream. Refrigerate at least 3 hours or overnight. {The longer, the better}

Recipe Source: Slightly adapted from Recipe.com

Wednesday, August 1, 2012

Strawberry-Lime Cream Cake {& Whipped Cream Frosting}

Photo credit to melskitchencafe.com

Yeah, my birthday was last month and...I made this...for myself...because that's how I roll. {Don't worry, this one is the last for the night.}
This recipe is rich in a way that I haven't ever really experienced before...non-chocolatey. Weird. Um, loved it though! I've had this thing for strawberry/lime. You should too. It's a lot of work, but worth it!

Strawberry-Lime Cream Cake
White Cake:
2 1/2 cups all-purpose flour
2 cups granulated sugar
1 teaspoon baking powder
1/2 teaspoon baking soda
1/8 teaspoon salt
1 1/3 cups buttermilk
1/2 cup butter, softened
1 teaspoon vanilla
4 egg whites

Strawberry Syrup/Puree:
*You can sub 1 1/2 cups of strawberry jam for the puree* {I think jam would be too sweet}
1 pint fresh strawberries, washed and hulled
4 tablespoons sugar
1 teaspoon lemon juice

Lime Cream:
{I would probably make this much again, but I only used about 2/3 of it!}
4 limes, for 1/2 cup fresh lime juice
1 (14-ounce) can sweetened condensed milk
2 cups heavy whipping cream

Whipped Cream Frosting:
2 cups heavy whipping cream
1/2 cup powdered sugar
1 teaspoon vanilla
1 envelope (about 2 teaspoons) unflavored gelatin
4 tablespoons water

For the cake, preheat the oven to 350 degrees F. In a large bowl, combine the flour, sugar, baking powder, baking soda and salt. Add buttermilk, butter and vanilla. Beat with an electric mixer on low speed for 30 seconds, scraping the bowl as needed. Increase the speed to medium and beat for 2 minutes. Add the egg whites and beat for 2 minutes more, scraping down the sides of the bowl as needed.

Pour the batter into 2 greased and floured 9-inch round cake pans. (I lined the bottom of mine with a parchment circle and greased the top of the parchment circle.) Bake the cakes for 28-30 minutes until a toothpick inserted near the center comes out with moist crumbs. Don’t overbake or the cakes will be dry. Cool the cakes on a wire rack for 10 minutes. Loosen the sides with a butter knife and remove the cakes from the pans to cool completely.

For the strawberry puree, combine all the ingredients in a blender and process until smooth.

For the lime cream, zest and juice the limes into a medium bowl. You should have about 1/2 cup lime juice. Add the sweetened condensed milk and mix well. Add the whipping cream and beat until medium-stiff peaks form. Cover with plastic wrap and refrigerate until needed.

For the whipped cream frosting, in a small bowl, place the water and sprinkle the gelatin over the top. Let the mixture stand for 3-4 minutes until the gelatin has thickened. Microwave for 20-30 seconds until the gelatin dissolves and the mixture is warm. Remove from the microwave and let the mixture cool to room temperature (don’t let it set up!). In a large bowl, whip the cream, sugar and vanilla until slightly thickened. While beating slowly, gradually add the cooled gelatin to the whipped cream mixture. Whip at high speed until stiff peaks form.

To assemble the cake, slice each cooled cake round in half horizontally to form 4 cake circles. Place one cake layer on a cake plate and spread an even layer of strawberry syrup over the top. Spread a thick layer of lime cream over the jam, leaving a 1/2-inch border around the edge as the top cake layers will press the cream out toward the edges. Repeat the same layering process with the next two layers. Top with the final cake layer and frost the entire cake with the whipped cream frosting. Garnish with fresh limes and strawberries, if desired. Chill for 1-2 hours before serving to let the cake set up.

Recipe Source: Mel's Kitchen Cafe

Strawberry-Lime Shortcakes with Coconut Cream

Photo credit to ourbestbites.com
LOVE this recipe. Super easy and de-lish. It's basically strawberry shortcake..."island style."

Strawberry-Lime Shortcakes with Coconut Cream
Angelfood or Pound Cake
4 cup sliced fresh strawberries
½ cup white sugar
4 tablespoons fresh-squeezed lime juice (about 2 limes)

For the Coconut Whipped Cream:
1 cup whipping cream
½ cup powdered sugar
2 teaspoon coconut extract
1 teaspoon vanilla extract
¾ cup toasted coconut

Mix sliced strawberries, sugar, and lime juice. Stir well and set aside. Stir occasionally over about 15 minutes. You want the sugar to dissolve and form a light syrup.
For the cream, place whipping cream in a bowl and beat with an electric mixer for about one minute. Slowly add in powdered sugar, and both extracts. Continue beating until soft peaks form.
Slice cake and spoon a layer of strawberries on top. Include the lime-syrup! Top with a generous dollop of whipped cream and sprinkle with coconut.
This serves about six, but it could be more or less depending on how what size you make them.
{Serve them with a quarter of lime so those that want to can add an extra kick of lime. Again...de-lish!}
{Also, use this coconut cream on LOTS of stuff!}

Recipe Source: Our Best Bites

Homemade Chocolate Cake

Well, hey. My MIL asked me to make a cake for a double birthday party. I thought..."Oh yeah, no problem." Well, of course I decide that I can't just make one out of a box. I must wow and impress. Don't ask me why. So I found this recipe on pinterest and decided to try it, and I'm so glad I did! Even though I got sick and wasn't able to go to the party. My hubby said everyone loved it (and we got the leftovers, which was awesome).
Also, pairing it with this chocolate frosting recipe was genius! (If I do say so myself).
IMG_8504
Photo Credit to youaremyfave.com
Homemade Chocolate Cake
Makes double 9" round pan

Unsalted butter, softened, for pans
3/4 cup unsweetened Dutch cocoa powder, plus more for pans
1 1/2 cups all-purpose flour
1 1/2 cups sugar
1 1/2 teaspoons baking soda
3/4 teaspoon baking powder
3/4 teaspoon salt
2 large eggs
3/4 cup low-fat buttermilk
3/4 cup warm water
3 tablespoons safflower {I used light olive} oil
1 teaspoon pure vanilla extract

Directions

Preheat oven to 350 degrees. Butter two 8-inch round cake pans (2 inches deep); dust with cocoa {I omitted this step}. Sift cocoa, flour, sugar, baking soda, baking powder, and salt into the bowl of a mixer {Next time, I will also omit the sifting}. Beat on low speed until just combined. Raise speed to medium, and add eggs, buttermilk, water, oil, and vanilla. Beat until smooth, about 3 minutes.
Divide batter between pans. Bake until set and a toothpick inserted into the centers comes out clean, about 35 minutes. Let cool for 15 minutes. Turn out from pans. Transfer, faceup, to wire racks. Let cool completely.
As you can see from the picture, she did three layers...I followed the recipe and only did two. I wanted a break from the chocolate frosting, so I put marshmallow creme between the layers. It was an ooey gooey mess...but SO yummy!

Recipe Source: Slightly adapted from Martha Stewart

Tuesday, May 22, 2012

Banana Bundt Cake with Chocolate Ganache

So I said to my dad on Sunday "Here is my dessert wall on Pinterest. Pick one." He picked this. And, boy, am I glad he did! Although I didn't get to try it that night, oddly enough. I made it, not realizing (because I'm awful at reading instructions BEFORE I start making it) that it had to cook for 1 hour 40 minutes, and I had to take the girls home to bed within the hour. That's how much I love my faja.
Oh, this dessert...it's thick and moist and the chocolate is just a hint. It's a perfect combination! Make it. Now.

Banana Bundt Cake with Chocolate Ganache
Photo Credit to mybakingaddiction.com
About 12 servings
1 1/2 cups bananas, mashed, ripe
2 teaspoons lemon juice
3 cups all-purpose flour
1 1/2 teaspoons baking soda
1/4 teaspoon salt
3/4 cup unsalted butter, softened
2 cups sugar
3 large eggs
2 teaspoons pure vanilla vanilla
1 1/2 cups buttermilk

4 ounces semisweet chocolate, chopped
1/2 cup heavy cream

Preheat oven to 275°. Thoroughly grease and flour a 12-cup non-stick bundt pan or use PAM spray for baking.

In a small bowl, mix mashed bananas with the lemon juice; set aside.

In a medium bowl, mix flour, baking soda and salt; set aside.

In the bowl of a stand mixer fitted with the paddle attachment or in a large bowl with an electric mixer, cream butter and sugar until light and fluffy, about 3 minutes. Beat in eggs, one at a time until fully incorporated. Stir in the vanilla.

Add in the flour mixture alternately with the buttermilk, mixing until combined. Stir in banana mixture.

Pour batter into prepared pan and bake in preheated oven for about 1 hour and 40 minutes or until a toothpick inserted in center comes out clean.

Remove from oven and place directly into the freezer (still in pan) for 45-60 minutes. This will make the cake very moist. Remove cake from freezer to a cooling rack for at least 3 hours.

When ready to serve, invert the cake onto a serving platter and prepare the chocolate ganache.

To make the ganache, pour the chopped chocolate into a medium mixing bowl, set aside. Pour the heavy cream into a microwave safe measuring cup (Pyrex) and microwave on high for about 1 minute or until bubbles begin to form on the surface. Take care to not overheat because the cream will boil over. Pour the hot cream over the chocolate and allow it to sit for about 3 minutes. Use a small whisk to combine the mixture into a smooth chocolate glaze. Drizzle over cooled cake. {I made the ganache, then kept it in a bowl so we could add however much we wanted on each piece and it worked great...maybe didn't look as pretty as hers...but tasted AWESOME!}

Recipe Source: My Baking Addiction


Wednesday, April 11, 2012

Lime Coconut Sour Cream Bundt Cake

Wow. For some reason I was craving a bundt cake. Any flavor. Weird huh? Oh well, it made me find this beauty. Although next time I will make sure to make it for a crowd so I can enjoy it for a couple nights and not a week, it was totally worth it. A fresh taste for dessert (versus the chocolate that inevitably finds its way into my mouth).
Post image for Lime Coconut Sour Cream Bundt Cake
Photo Credit to mybakingaddiction.com
Lime Coconut Sour Cream Bundt Cake
Makes 12-14 servings
For the Cake:
1 cup unsalted butter , softened
1 1/2 cups granulated sugar
zest of 3 medium limes (I will do 2 next time)
2 teaspoons vanilla
2 eggs
2 cups all-purpose flour
1 teaspoon baking powder
1 teaspoon baking soda
1 cup Sour Cream
1/2 cup sweetened flaked coconut (I will chop it next time for smaller pieces)
For the Lime Glaze:
1 cup confectioners’ sugar, sifted
5 tablespoons heavy cream
½ teaspoon pure vanilla extract
zest of 1 medium lime

Preheat oven to 350 degrees F. Grease and flour a 10 inch bundt pan, set aside.
In the bowl of a stand mixer, fitted with the paddle attachment, or with a hand mixer in a large bowl, cream the butter until smooth.
In a medium bowl, combine the sugar and lime zest mixing together with your fingertips until the sugar is moistened and fragrant. Add the sugar mixture gradually to the butter and beat on medium speed until light fluffy, about 3 minutes. Mix in vanilla.
Add eggs, 1 at a time, beating well after each addition.
In a medium bow, combine flour, baking powder and baking soda. Add flour mixture to sugar mixture alternately with sour cream, beating until well blended after each addition. Fold in coconut.
Spoon mixture into prepared pan and smooth the top with a spoon or spatula.
Bake 50 minutes to 60 minutes or until a toothpick inserted in center comes out clean. 8. Cool for 20 minutes on a wire rack. Invert cake onto wire rack; gently remove pan. Cool completely.
Lime Glaze:
In a medium bowl, combine all ingredients and stir until smooth. If mixture is too thick add more cream one teaspoon at a time until you reach the desired consistency. I like my glaze to be thick so 5 tablespoons usually turns out to be to my liking.
Spoon over cooled cake.


Recipe Source: My Baking Addiction

Better Than (Sex) Cake

I figured I would be judged less if I put parentheses around sex. But honestly, who doesn't know what I'm talking about when I title my post this? This delicious, moist, chocolatey, crunchy, smooth, sweet cake? Um, maybe I should stop...

Better Than Sex Cake
Makes 9x13 pan
1 (18.25 ounce) package devil's food cake mix
1 (14 ounce) can sweetened condensed milk
6 ounces caramel ice cream topping
3 (1.4 ounce) bars chocolate covered toffee, crushed (I used Heath Bars)
1 (8 ounce) container frozen whipped topping, thawed

Bake cake according to package directions for a 9x13 inch pan; cool on wire rack for 5 minutes. Make slits (I used thick chopsticks to make holes) across the top of the cake, making sure not to go through to the bottom. Immediately pour sweetened condensed milk all over top (I suggest pouring most on the top and not so much on the outsides if your cake "domed" like mine did), then pour that caramel topping on as well. Place in fridge for at least one hour.
Let cake cool completely, then top with whipped topping. Decorate the top of the cake with some chocolate toffee bar chunks and swirls of caramel topping. Refrigerate until ready to serve!

Recipe Source: Combination of three recipes found on Food.com