Showing posts with label Side Dish. Show all posts

Sunday, April 26, 2015

{The Best} Fluffy Whole Wheat Dinner Rolls

Seriously the fluffiest.
Fluffy Whole Wheat Dinner Rolls
Photo Credit to Mel's Kitchen Cafe
1 1/2 cups warm water
3/4 tablespoon instant yeast (or 1 tablespoon active dry yeast)
2 tablespoons granulated sugar
2 tablespoons canola or vegetable oil
1 teaspoon salt
1/4 cup vital wheat gluten (see note)
3-4 cups whole wheat flour, give or take a little (see note)

In the bowl of a stand mixer or in a large bowl by hand, combine the warm water, yeast, sugar, oil, salt, gluten, and 2 cups of the flour. If you are using active dry yeast instead of instant yeast, let the yeast proof in the warm water and sugar for about 3-5 minutes until it is foamy and bubbly before adding the oil, salt, gluten and flour.
While mixing, gradually add the rest of the flour until the dough has pulled away from the sides of the bowl. Judge the dough by how it feels, not necessarily by the exact flour amount called for in the recipe (see a tutorial on working with yeast here). The dough should be soft and smooth but still slightly tacky to the touch.
Knead the dough in the stand mixer or by hand until it is very smooth and elastic, about 7 minutes in a stand mixer or 10-12 minutes by hand. As the dough is kneaded, it will continue to absorb some of the liquid and become less sticky so take care not to overflour at first as the texture will change as it kneads - and you can always add a bit of flour partway through if it seems overly sticky.
If kneading by hand, try using a bit of oil or cooking spray on the counter to help prevent stickiness instead of flour - that way the dough doesn't get overfloured. Lightly spray a large bowl with cooking spray and place the dough in the bowl. Cover the bowl with lightly greased plastic wrap. Let the dough rise until it has doubled, 1-2 hours.
Lightly punch down the dough and turn it out onto a lightly greased countertop. Divide the dough into 12 equal pieces and form the dough into round balls (a video tip on shaping the dough into rolls here).
Place the rolls on a lightly greased or silpat-lined baking sheet about an inch or two apart. Cover the rolls with lightly greased plastic wrap. Let the plastic wrap gently hang over the sides of the pan to fully cover the rolls but not press them down. Let the rolls rise until doubled, about 45 minutes.
Preheat the oven to 400 degrees. Bake for 12-14 minutes until lightly browned and cooked through.

Recipe Source: Mel's Kitchen Cafe

Sweet Cornbread

Maybe I should try a new cornbread recipe, but this one is amazing. {As is the one Sharrie makes...I need to get that recipe...}
Photo Credit to Mrs Harding Cooks
Sweet Cornbread
1 1/2 cup flour
2/3 cup sugar
1/2 cup yellow cornmeal
1 Tbs baking powder
1/2 tsp salt
1 1/4 cup milk
2 large eggs
1/3 cup vegetable oil
3 Tbs butter, melted

Preheat oven to 350. Mix dry ingredients and wet ingredients separately, then whisk together to form a smooth batter. Pour in a greased 9x13 pan, bake for 30-35 minutes until edges are golden brown. Delicious served with honey butter!

Recipe Source: Mrs Harding Cooks

Saturday, April 25, 2015

Simple Skillet Green Beans

Have mercy. These are amazing. Simple, so so delicious, and healthy-ish.
The Best Green Beans
Photo Credit to Mel's Kitchen Cafe
Simple Skillet Green Beans
1 teaspoon oil or butter
1 pound fresh green beans, ends trimmed
3/4 cup low-sodium chicken or vegetable broth
Salt and pepper to taste

In a large 12-inch nonstick skillet, heat the oil or butter over medium heat. Add the green beans and cook for 2-3 minutes, stirring often, to crisp up the edges of the beans just slightly.
Pour in the broth and bring the beans/broth to a simmer. Cover the skillet and cook anywhere from 6-10 minutes, depending on how tender you like your green beans. Keep an eye on the skillet - if it is simmering too vigorously and the liquid evaporates out, add a bit more as needed.
Season with salt and pepper to taste and serve immediately.

Recipe Source: Mel's Kitchen Cafe

Tuesday, September 16, 2014

Perfect Brown Rice

I love brown rice, but I'm not awesome at cooking it and it's always a little harder than I want it to be. Anyways, this rice is the softest and loveliest brown rice I've ever had. Delish.
Photo Credit to Our Best Bites
Perfect Brown Rice
1 1/2 cups brown rice
2 1/3 cups water
2 teaspoons unsalted butter or vegetable oil
1/2 teaspoon salt

Adjust oven rack to middle position. Preheat oven to 375 degrees. Spread rice in an 8-inch square baking dish.
Bring water and butter or oil to a boil, either in a saucepan or in the microwave. Keep an eye on it and take it off heat immediately after it starts boiling. Immediately stir in salt and pour water over rice in baking dish. Cover baking dish tightly with 2 layers of foil, or heavy-duty foil. Transfer baking dish to oven and bake rice until tender, about 1 hour.
Remove baking dish from oven and uncover. Fluff rice with fork, then cover dish with kitchen towel and let rice stand for 5 minutes. uncover and let rice stand 5 minutes longer. Serve immediately.

Recipe Source: Our Best Bites

{Olive Garden} Breadsticks

These are the real deal folks. Delicious and really taste like they're fresh out of the Olive Garden oven. Mmmm...
Photo Credit to Readable Eatables
{Olive Garden} Breadsticks
Dough: 
1 1/2 cups warm water 
2 Tbs sugar 
1 Tbs yeast
1 Tbs salt (yes, the recipe calls for 1 Tablespoon, which I use every time and they turn out great.)
2 Tbs butter, softened 
4-5 Cups flour 

Topping: 
3 Tbs butter melted 
sea salt 
1 tsp garlic powder 

For the dough, pour the water into a stand mixer with the sugar and yeast, let that sit and froth for about 10 minutes. Add salt, butter, and 2 cups of flour. Mix the dough on low. Add the rest of the flour a half cup at a time, until dough scrapes the sides of the bowl clean. Mix the dough about 5 minutes on medium speed, until its soft and easy to work with.
Let the dough rest in the bowl until doubled in size, about 1 hour and then roll it out. Roll the dough out into a long log, spray a knife with cooking spray and cut the dough into 24-28 pieces. Roll those pieces into about 6 inch long snakes. Spray 2 large cookie sheets with cooking spray, ( I usually only use one) and lay the breadsticks out leaving about 2 inches between each one.
Place them in the oven with the temperature turned to 170 degrees. Let them rise for about 15 minutes, or until doubled in size.( I have also let them sit at room temp until they are doubled in size and then bake them in the oven)
Once risen, brush them with the 1 1/2 T of melted butter and sprinkle them with salt. Now preheat the oven to 400 degrees and bake them for 12-14 minutes or until golden brown. While they are baking combine the rest of the melted butter with 1 tsp garlic powder. When the breadsticks are golden brown, remove them from the oven and brush them with the butter/garlic mixture.

Recipe Source: Readable Eatables

Tuesday, April 1, 2014

{Grandma's} Marshmallow Popcorn

Oh. This. Stuff. I've never had any popcorn like this. And Grandma only makes it around Christmas, so we usually only get it once maybe twice a year. Unless I make it, which is rarer than it should be.
marshmallow_popcorn
Photo Credit to The Cupcake Theory
{Grandma's} Marshmallow Popcorn
2 gallons popped corn {three microwave bags}
1 cup margarine
2-3 cups mini marshmallows
1 1/2 cup sugar
1/2 cup light corn syrup
1-2 cup almonds, optional

Place margarine, sugar and syrup in a saucepan and bring to a boil over medium-high heat. Stir until sugar is dissolved. Add marshmallows and stir until they are melted.
Mix popcorn and almonds {if using}. Pour marshmallow mixture over popcorn and toss until all are coated.

Recipe Source: Grandma Schwartz

Monday, March 31, 2014

{Mom's} Pasta Salad

I feel like this is a classic "90's" salad, but I absolutely love it. I grew up with my mom taking it everywhere and it brings back so many great memories.
Photo Credit to Deep South Dish
{Mom's} Pasta Salad
1 16 ounce bottle Zesty Italian dressing
1/2 bottle Schilling Salad Supreme
1 red onion, diced
1 cucumber, diced
2-3 tomatoes, diced
1 green pepper, diced
Optional:
freshly grated parmesan cheese
avocado, diced
Italian salami, sliced
cheese, cubed

Cook pasta according to package directions and rinse with cold water. 
Mix the other ingredients well. Then add the pasta.
Chill for at least two hours {best when chilled overnight}, then serve.

Recipe Source: Susan Warren

Macaroni Shrimp Salad

This is the classic recipe for macaroni shrimp salad, but I absolutely love it. How could you not? Macaroni, shrimp, and mayo plus other yummies? Perfectly delicious.
Shrimp Macaroni Salad | foodiecrush.com
Photo Credit to Foodie Crush
Macaroni Shrimp Salad
12 ounce package macaroni, cooked
1/2 22 ounce bottle miracle whip
2 cans sliced olives
2 bunches green onion
1/2 stalk celery
1 pound shrimp, rinsed
Pinch of: 
garlic salt
onion salt
seasoned salt

Add all ingredients into a large mixing bowl and mix well. Best if served after a few hours of refrigeration.

Recipe Source: Susan Warren

Sunday, March 30, 2014

{Grandma's} Funeral Potatoes

I have never had any funeral potatoes that taste like these. They are super delicious and I swear that they are from Heaven. Which is awkward since they're funeral potatoes…
Photo Credit to Jamie Cooks It Up
{Grandma's} Funeral Potatoes
10-12 large potatoes
1/3 grated onion
2 cups sour cream
2 cans cream of chicken soup
2 cups grated cheese
1 cube of margarine
1 cup crushed cornflakes

Boil potatoes for 40 minutes then shred. In a large saucepan, put 1/2 the butter, cream of chicken soup, sour cream, cheese & onion. Heat until cheese is melted. Pour that over the potatoes in a big bowl and mix. Put that mixture in a 9x13. Melt the other 1/2 of butter and mix with cornflakes. Put those on top of the potato mixture.
Bake at 350 for 30-45 minutes.

Recipe Source: Grandma Schwartz

Sweet Potato Crunch

This lovely was sent to me by my mother-in-law, Sharrie. Its pretty easy and so delicious, especially for Thanksgiving.
Sweet Potato and Carrot Crunch
Photo Credit to Pots & Pans, etc, etc.
Sweet Potato Crunch
3 large sweet potatoes
4 tablespoons butter, softened
2 eggs
1/3 cup evaporated milk
1 teaspoon vanilla
1/2 cup sugar

Topping:
1/3 cup butter, melted
1 cup brown sugar
1/2 cup flour
1 cup chopped pecans

Bake Sweet potatoes until tender at 350 for 45-60 minutes. Remove skins, mash, then add rest of ingredients and mix well. Spread in a baking dish.
Mix the topping ingredients well, the spread over the sweet potatoes. Bake at 350 for 30 minutes.

Recipe Source: Sharrie Webster

Saturday, March 8, 2014

Rustic Crusty Bread

I love no-knead bread. This is the first no-knead recipe I've ever tried and I know that I love no-knead bread. It's like I can't stop saying no-knead because the concept is so amazing. I love this bread. Especially when you put garlic herb butter on it. Oh my heaven.
Rustic Crusty Bread
Photo Credit to Mel's Kitchen Cafe
Rusty Crusty Bread
1 1/2 tablespoons instant yeast {I used active dry and let it sit for about 10 minutes}
1 tablespoon salt
6 1/2 cups unbleached, all-purpose flour, plus more for dusting dough
3 cups water

In a large bowl mix yeast and salt into lukewarm water (about 100 degrees). Stir in flour, mixing until there are no dry patches. Dough will be quite loose. Cover lightly with a kitchen towel but don't seal the bowl airtight. Let the dough rise at room temperature 2 hours (or up to 5 hours).
Bake at this point or refrigerate, covered in an airtight container, for as long as two weeks. When ready to bake, cut off a grapefruit-size piece with serrated knife (I have only ever made two loaves out of the batch of dough so I just divide the dough in half to form my first loaf). Turn the dough in your hands to lightly stretch the surface, creating a rounded top and a lumpy bottom. Put the dough on a piece of parchment paper set on a pizza peel or a rimmed baking sheet turned upside down. Let the dough rest for 40 minutes for room temperature dough; if you have used the dough out of the refrigerator, let it rest for 1 1/2 hours. Repeat with remaining dough or refrigerate it.
Place a broiler pan on the bottom rack of the oven. Place a baking stone on the middle rack and preheat oven to 450 degrees. Heat the stone at that temperature for 20 minutes before baking.
After the dough has rested and is ready to bake, dust the dough lightly with flour, slash the top with serrated or very sharp knife three times. Slide the dough (with the parchment paper) onto the baking stone. Pour one cup of hot water into the broiler pan and shut the oven quickly to trap the steam. Bake the bread until well browned, about 24-28 minutes. Cool completely.
If you don't have a baking stone, try turning a rimmed baking sheet upside down and heating it in the 450 degree oven for 10 minutes prior to baking. When ready to bake, slide the parchment paper with the dough on it directly onto the overturned baking sheet and bake according to the recipe. You can also stretch the rounded dough into an oval and place in a greased loaf pan. Let it rise for 40 minutes if fresh (add an extra hour if the dough has been refrigerated). Bake in the loaf pan in the 450 degree oven, watching the time carefully - check after 20-22 minutes.

Recipe Source: Mel's Kitchen Cafe

Note: If you follow the link, Mel has some awesome photos and a simple How-to.

Saturday, February 8, 2014

Peanut Butter and Jam Skillet Monkey Bread

You can never go wrong with peanut butter and jam. Never. Seriously I love the combination so much. Yeah, I'm pretty sure I've said this before, but I used to mix peanut butter and jam for a snack. Then, my roommates would get mad that I left it in the fridge and it looked gross. Not gross, amazing. So these are wonderful and beautiful.

Photo Credit to Picky Palate

Peanut Butter and Jam Skillet Monkey Bread
1 can Refrigerated Biscuits, 8 count (I used the Simply line from Pillsbury)
1/4 cup butter, melted
1/4 cup granulated sugar
1/4 cup creamy peanut butter, warmed in microwave until liquid like {I probably used more…double?}
1/2 cup jelly of choice, warmed in microwave until liquid like {Also, used just a little more}
4 tablespoons heavy cream
1/2 cup powdered sugar

Preheat oven to 350 degrees F. and spray 9-inch cast iron skillet with non-stick cooking spray.
Cut each biscuit into fourths. Place melted butter into a large ziplock bag and toss in cut biscuits. Shake around to coat then toss in sugar, mixing to combine. Pour into prepared 9-inch cast iron skillet and drizzle warmed peanut butter and jelly over top. Bake for 18-22 minutes or until cooked through and golden.
Whisk the heavy cream and powdered sugar until combined then drizzle over warm biscuits. Serve warm.

Recipe Source: Picky Palate

Mandarin Orange Jello Salad

My mom literally makes this every time my dad's side of the family gets together. Mostly because of my cousin's husband whose favorite it is. But we all really love it. Every time I've made it for something, it's the first salad gone. It makes me very happy.
Photo Credit to Five Little Chefs
Mandarin Orange Jello Salad
Makes 9x13 pan {despite the picture}
1 large package Cook & Serve Lemon pudding
1 large package Orange Jell-o
1 small package Instant Lemon pudding
1 cup milk
1/2 cup powdered sugar
1 8 oz cool whip
1 can mandarin oranges

Prepare Cook & Serve Lemon pudding and the Orange Jell-o as directed for each. Put them both in the 9x13 pan and mix them well. Refrigerate at least 4 hours.
Mix Instant Lemon pudding, powdered sugar, and milk, then fold in the cool whip. Layer on top of the Orange Jello. Drain can of mandarin oranges, then place them on the pudding layer in a fun pattern of your choosing!

Recipe Source: Susan Warren, aka Mamacita

Thursday, November 21, 2013

Baked Spaghetti Squash and Cheese

Wonderful healthy side dish. Yes, sometimes I eat and/or make healthy things. I know it seems shocking, but it's super true.
Photo Credit to Skinnytaste
Baked Spaghetti Squash and Cheese
5 1/2 cups cooked spaghetti squash (from about 2 small)
1 tbsp butter
1 tbsp olive oil
1/4 cup minced onion
1/4 cup flour (use 2 tbsp corn starch for gf)
2 cups skim milk
1 cup fat free chicken broth (vegetable broth for vegetarian)
8 oz Sargento 2% reduced fat mild cheddar
salt and pepper, to taste
Italian spices, to taste
4 cups (about 4 oz) baby spinach
1/8 cup grated parmesan {Maybe a little more}

Preheat the oven to 375ºF.

Cut the squash in half lengthwise; remove and discard seeds. Place squash on a baking sheet. Bake until tender, about 1 hour. Separate the strands of squash with a fork and place in a medium bowl; discard shells. Maintain the oven temperature.

Heat butter and oil in a large saucepan over medium heat. Add onions and cook about 2 minutes. Stir in flour. Reduce heat to low and cook, stirring continually 3 - 4 minutes.

Add milk and chicken broth and continue whisking, raising heat to medium-high until it comes to a boil and becomes smooth and thick, about 2 minutes stirring; season with salt and pepper and italian spices.

Once it becomes thick, remove from heat, add cheddar cheese and mix well until cheese is melted. Adjust salt and pepper to taste, add cooked spaghetti squash and baby spinach, pour into a baking dish and sprinkle parmesan cheese on top. Bake until bubbly and golden 25 to 30 minutes.

Recipe Source: Slightly adapted to Skinnytaste

Grilled Lime Coconut Chicken and Coconut Rice

Lime plus coconut chicken. Why would you not try this? And love it?
Lime Coconut Chicken with Coconut Rice
Photo Credit to Mel's Kitchen Cafe
Grilled Lime Coconut Chicken and Coconut Rice
Chicken and Marinade/Sauce:
3 tablespoons oil
Zest and juice of 1 lime
1 teaspoon ground cumin
1 1/2 teaspoons ground coriander
2 tablespoons low-sodium soy sauce
1 1/2 teaspoons salt
2 tablespoons sugar
2 teaspoons curry powder
1/2 cup canned coconut milk, light or regular
pinch cayenne pepper
2 pounds boneless, skinless chicken breasts (see note above)
1/4 cup chopped fresh cilantro
Fresh limes, cut into wedges

Coconut Rice:
1 cup jasmine rice
1 cup canned coconut milk, light or regular
1 cup water
1/2 teaspoon salt

In a large liquid measuring cup or medium bowl, whisk together the oil, lime zest, lime juice, cumin, coriander, soy sauce, salt, sugar, curry powder, coconut milk, and cayenne pepper. Place the chicken in a large ziploc bag and pour the marinade over the chicken. Seal the bag and refrigerate for at least 2 hours and up to 8 hours.
For the coconut rice, bring the rice, coconut milk, water and salt to a simmer in a medium saucepan. 

Cover, reduce the heat to low and simmer for 15-16 minutes until the liquid is mostly evaporated. remove from the heat and let stand for 10 minutes before fluffing with a fork and serving.
Preheat a charcoal or gas grill (see note above if not grilling) to medium-high heat. Grill the chicken for 6-7 minutes per side (actual time will depend on the thickness of the chicken). While the chicken is cooking, pour the marinade into a small or medium saucepan. Bring the mixture to a rolling boil and boil for 10 minutes, stirring occasionally.
Place the grilled chicken on a serving platter or plate. Drizzle with sauce (reserve the remaining sauce to serve separately) and sprinkle fresh cilantro over the top. Serve with lime wedges and additional sauce.

Recipe Source: Mel's Kitchen Cafe

Wednesday, November 20, 2013

Crash Hot Potatoes

I'm very grateful to know The Pioneer Woman, and have loved almost every recipe I get from there. I've tried making a different {much harder and messier} version that I didn't think was worth it, but these are awesome! They add a little crunch with the chewy smooth potatoes.
DSC_0051_6300
Photo Credit to The Pioneer Woman
Crash Hot Potatoes
12 whole New Potatoes (or Other Small Round Potatoes)
3 Tablespoons Olive Oil
Kosher Salt To Taste
Black Pepper To Taste
Rosemary (or Other Herbs Of Choice) To Taste
Preparation Instructions

Bring a pot of salted water to a boil. Add in as many potatoes as you wish to make and cook them until they are fork-tender.

On a sheet pan, generously drizzle olive oil. Place tender potatoes on the cookie sheet leaving plenty of room between each potato.

With a potato masher, gently press down each potato until it slightly mashes, rotate the potato masher 90 degrees and mash again. Brush the tops of each crushed potato generously with more olive oil.

Sprinkle potatoes with kosher salt, fresh ground black pepper and fresh chopped rosemary (or chives or thyme or whatever herb you have available.)

Bake in a 450 degree oven for 20-25 minutes until golden brown.

Recipe Source: The Pioneer Woman

Butter-Pecan Sweet Potatoes

Holy sweet potatoes. I love them plain. So these, with butter and pecans, and brown sugar. Ay ay ay! Mama! These are super awesomely delicious.
Photo Credit to All Things Simple
Butter-Pecan Sweet Potatoes
8 medium sweet potatoes (5 lbs.), or one per person
olive oil
course salt
2 T. butter, cut into small pieces
2 T. light brown sugar
1/3 c. pecan pieces
1/8 tsp. cayenne pepper

Preheat oven to 400 degrees. Peel potatoes and halve lengthwise; slice crosswise 1/2 inch thick. On a baking sheet, toss potatoes with olive oil (we brush it on both sides); season with salt.

Transfer half the potatoes to a second baking sheet; cook both sheets until potatoes are tender, tossing occasionally, 25-30 minutes.

Sprinkle with butter, brown sugar, pecan pieces and cayenne pepper, dividing evenly. Bake until sugar is carmelized and hard, about 10 minutes. Toss gently; serve immediately.

Recipe Source: All Things Simple

Thursday, September 26, 2013

{Copycat} Panda Express Chow Mein

Seriously. This is a true copycat recipe and I absolutely loved it.
Photo Credit to Food.com
Panda Express Chow Mein
1/4 c. soy sauce
1 Tbsp. brown sugar
2 cloves garlic, minced
1 tsp. fresh ginger, grated
ground black pepper, to taste
2-3 Tbsp. vegetable oil
3 (5.6 oz) packages refrigerated Yaki Soba noodles (found in the produce section of the grocery store.. usually the 3 packages are sold together in one 17oz. pack)
2/3 c. chopped celery (chopped diagonally)
1 medium-sized onion, thinly sliced
2 c. chopped cabbage

In a small bowl combine soy sauce, brown sugar, garlic, ginger and black pepper. Set aside.
Remove Yaki Soba from packages and discard included flavoring packets. Rinse noodles well, drain, and set aside.
Heat oil in a large wok or skillet. Add celery and onion and saute for about 1-2 minutes or until onions start to become soft and transparent. Add cabbage and saute an additional minute or so.
Toss Yaki Soba noodles and soy sauce mixture with the vegetables over medium-high heat for an additional 2-3 minutes or until noodles are heated through.

Recipe Source: Favorite Family Recipes

Thursday, April 4, 2013

Creamy Orzo with Asparagus

When I acquire a random ingredient, it's not often I don't already have a recipe pinned. However, when receiving asparagus from my Bountiful Basket a few weeks ago, I didn't like any I had pinned and I searched on google. I know. Weird.
Luckily, I found this awesome, easy, recipe which made me love asparagus even more than my green heart did.
Photo Credit to Celeste
Creamy Orzo with Asparagus
1 cup orzo
1 cup asparagus, cut into 1 inch pieces
1 tbsp butter or margarine
1/4 to 1/2 cup cream
1/4 cup grated parmesan cheese
Salt & Pepper, to taste

Bring a large sauce pan of water (filled about halfway) to a boil over medium heat. Cook the orzo until tender, about 10 minutes.

After the orzo has been cooking for about 5 minutes, add the asparagus to the same pot (this will allow the orzo and asparagus to cook in the same pot and keep the clean-up to a minimum!).

Once the orzo and asaparagus are cooked and tender, drain and return to the pot.

Quickly add the parmesan cheese and butter. Stir thoroughly, allowing both the cheese and butter to melt. Slowly add the cream to the mixture, while stirring. Continue to stir and add cream until you reach your desired consistency.

Season with salt and pepper.

Voila! You have a delicious side dish! Serve immediately.

Recipe Source: Sugar & Spice by Celeste

Monday, January 21, 2013

Light & Fluffy Dinner Rolls

So my mom gets rolls for the Warren Christmas party basically every year. We used to get them from a bakery that made fluffy, buttery, scrumptious rolls that were to die for. Now, she gets some great rolls, but cannot remember where she got "the rolls." Luckily, I came across this recipe. They are the closest things to "the rolls" I've ever found and they are so good I can't stop eating them (no matter how much willpower I don't have).

Light & Fluffy Dinner Rolls
Makes 48 rolls
1 1/2 cups of milk
3/4 cup + 1 Tablespoon Sugar
1 egg
1 Tablespoon salt
2 Tablespoons yeast
2 cups of warm water
about 9-10 cups of all purpose flour
at least 1 cup of butter

Photo Credit for all photos to howdoesshe.com
To start out: Scald 1 1/2 cups of milk, 3/4 cup sugar and 1/2 cup of butter, in a microwave safe bowl, for about 2 minutes. Cutting the butter into pieces helps it melt faster. There will probably be some little cubes of butter still floating in the hot mixture, they will melt.

We are going to add yeast to this hot mixture, but it will be too hot to just dump the yeast straight in (it would kill it!). To cool it down stir in 1-2 cups of flour, then add 1 egg and 1 Tablespoon of salt, and leave it to cool for a couple of minutes. Meanwhile, in a measuring cup dissolve 2 Tablespoons of yeast in 2 cups of warm water and 1 Tablespoon of sugar. Let it sit for a couple of minutes until it is bubbly.

**Keep track of how much flour you are adding!!!
Make sure your milk mixture is just warm, not boiling and add the yeast mixture!
Using a fork or wooden spoon, gradually stir in 9-10 cups of flour (counting the flour you have already added to cool it earlier). I would recommend only adding 2 cups at time and stirring in between. These rolls turn out so much better when they are mixed by hand.
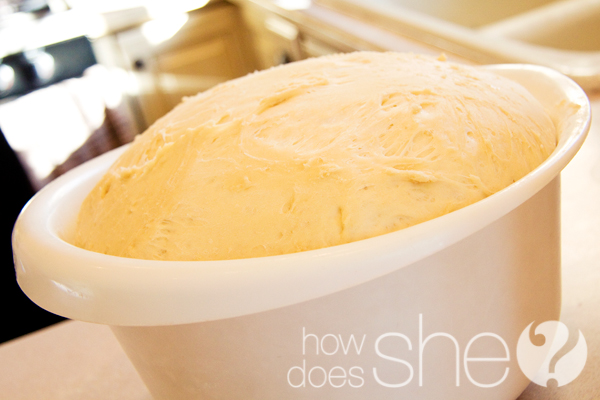
At the end the dough will be dense and sticky, and may be hard to stir, you can use your hands to incorporate the rest of the flour if needed. Be sure not to add too much flour. Then smooth the dough out and cover the bowl with plastic wrap. Leave it in a warm place and let it raise.
I came across this fun Thanksgiving idea on Pinterest – for Gratitude Rolls. I thought it was so cute and wanted to show you all how it’s done! Gather a list of things for which your family is thankful. Type it up in columns, then print it out. Yes, my 3-year-old said he was grateful for chocolate milk.. but I’m pretty sure we can all agree
Cut the list into strips with scissors or a paper cutter. Then set them aside.
When your dough is close to raising completely, butter 2 cookie sheets and set them aside.
Let the dough raise until it has doubled in size.
Cover your working space with flour to prevent the dough from sticking. Dump your dough out and divide it into 4 balls. Eyeball the sizes, then lift them up and feel the weight of each ball. Try to make them even, but they don’t have to be perfect.
Using one ball of dough at a time: roll the dough into a circle on a floured counter. Once it is rolled out spread the top with butter from edge to edge. You will use about 2 Tablespoons per circle of dough.

Cut the dough into quarters using a pizza cutter.

Then cut each quarter into 3 pieces. You should end up with 12 triangles from each circle of dough.

If you would like to add the thankful notes, now is the time!

Place one thankful note lengthwise on the triangle of dough.

Make sure you spread plenty of butter when using these notes, It will prevent them from sticking!Whether or not you include a thankful note, you will roll the dough starting with the wide end of the triangle.

Tuck the tail of the triangle under the roll and place it on the buttered cookie sheet. You will make 3 rows, with 8 rolls per row. This will give you 24 rolls per pan. Two balls of dough will fill 1 pan. You will get a total of 48 rolls!

Pre-heat your oven to 350 degrees. Place the pans of rolls in a warm place (on top of the oven if possible) to let them rise. Once they are touching and full in size, cook (one pan at a time) in the oven ’till they are golden brown. About 10 – 15 minutes, It may take longer depending on how hot your oven cooks. Keep a close eye on your first pan to get the right time for the second.

While they are still hot and fresh out of the oven run a stick of butter over the tops of the rolls for a delicious buttery glaze.

The kids will love opening these thankful rolls. It’s just like a fortune cookie!

Read aloud the many things you are grateful at your Thanksgiving feast.

Make it a game and guess who’s thankful note you are reading!

These yummy dinner rolls will be a hit at any event!

Recipe Source: How Does She