Showing posts with label Mexican. Show all posts

Saturday, April 25, 2015

Mexican Stuffed Peppers with Quinoa & Black Beans

Love this because it was vegetarian and easy and quick.

Mexican Stuffed Peppers with Quinoa & Black Beans // One Lovely Life
Photo Credit to One Lovely Life
Mexican Stuffed Peppers with Quinoa & Black Beans
4 bell peppers (any color), sliced in half stem-to-tip, seeds removed
1c quinoa, uncooked
½ medium onion, diced
1 (15oz) can black beans, drained and rinsed
1 roma tomato, seeded and diced
1 (4oz) can diced green chiles (don't drain)
¼ c cilantro, minced
¼ tsp salt
¼ tsp pepper
olive oil, if desired
½ c Monterrey Jack, grated*
½ c cheddar cheese, grated*
1 recipe red enchilada sauce (or 1 (28oz) can)

Add quinoa and onion to a large saucepan with 2 cups of water and a pinch of salt. Bring to a boil over medium-high heat. Boil 5 minutes, cover, turn off heat and let steam 15 minutes. Fluff with a fork.
In the meantime, microwave pepper halves 2-3 minutes to soften slightly. (Prepared this way, the peppers should come out crisp-tender. If you want them crisper, you can omit this step.)
Pour quinoa/onion mixture into a mixing bowl. Stir in black beans, tomato, green chiles and their juices, cilantro, ¼ tsp salt, and ¼ tsp pepper. If the mixture seems to dry, drizzle in a bit of olive oil (I didn't need any).
Pour enchilada sauce into a 9x13" baking dish. Divide filling among peppers. Nestle stuffed peppers into the enchilada sauce. Sprinkle with cheeses.
Cover the pan with foil and bake at 375 degrees 25-30 minutes. Remove foil and cook about 5 minutes longer. Serve peppers drizzled with enchilada sauce.

Recipe Source: One Lovely Life

Slow Cooker Mexican Shredded Beef Enchiladas

Loved these. Very flavorful, super tender, and easy!
Slow Cooker Beef Enchiladas
Photo Credit to Mel's Kitchen Cafe
Slow Cooker Mexican Shredded Beef Enchiladas
1 (2-3 pound) chuck or sirloin beef roast
2 cups low-sodium beef broth
2 tablespoons apple cider vinegar
1 cup (8 ounces) salsa
1 teaspoon ground cumin
1 teaspoon chili powder
1 teaspoon onion powder
1 teaspoon garlic powder
1 teaspoon salt
1/2 teaspoon pepper
2 tablespoons cornstarch or flour
10 6- or 7-inch flour or corn tortillas {ish}
1 cup shredded sharp cheddar cheese
1 1/2 cups shredded Monterey Jack cheese
Fresh cilantro (optional)

In a 4- or 5-quart slow cooker, add the beef roast. Whisk together the broth, vinegar, salsa, cumin, chili powder, onion powder, garlic powder, salt and pepper. Pour over the roast, cover the slow cooker, and cook on low for 8-10 hours until the beef is tender and shreds easily.
Remove the roast from the slow cooker and place in a large bowl or shallow pan (like a 9X13).
Pour the mixture from the slow cooker into a saucepan and bring to a simmer. In a small bowl, whisk together the cornstarch (or flour) with about 2-3 tablespoons water (a bit more water if using flour). Whisk the slurry into the simmering liquid and cook, stirring constantly, until the mixture is thickened slightly, 4-5 minutes. Add additional salt and pepper to taste, if needed.
Pour about 1/2 cup sauce in with the beef and toss. Spread another 1/2 cup sauce on the bottom of a 9X13-inch pan. Toss the cheddar and Monterey Jack cheeses together.
Fill each tortilla with some of the beef mixture and a sprinkle of cheese. Roll up and place in the pan. I usually try and fit ten enchiladas in a 9X13-inch pan (if the pan is lengthwise, two rows of five).
Pour the remaining sauce over the enchiladas (you may not need to use all the sauce if you feel like it will drown the enchiladas or you may need to reserve some for an additional pan if you made more enchiladas due to a larger roast, etc.).{I think I'll dump all the sauce on next time.
Top with any remaining cheese and bake at 350 degrees for 20-30 minutes until bubbly and hot. Let the enchiladas rest for 5-10 minutes before serving.
Sprinkle with fresh cilantro, if desired, and serve.

Recipe Source: Mel's Kitchen Cafe

Friday, September 26, 2014

Barbecue Chicken Quesadilla

I love simple, easy, and quick. This is definitely one of those! You for sure need to add a side of vegetables, or fruit, or, in our case, both.

Photo Credit to Mrs Harding Cooks
Barbeque Chicken Quesadillas
onion, sliced (one small onion was about right for two quesadillas)
olive oil
dash salt
dash sugar
chicken, cooked and shredded (we had 2 leftover drumsticks)
sharp cheddar cheese, shredded
mozzarella cheese, shredded (any kind of cheese you have will do)
barbecue sauce
tortillas

Caramelize the onions: Heat olive oil over medium-low heat (about 1 T to 1 onion), add onions, salt and sugar and cook, stirring occasionally, for 20-30 minutes.

Wipe out the skillet from the caramelized onions and heat to medium. Pile onions, shredded chicken and cheese on tortilla. Drip a few dollops of barbecue sauce over it, then top with a second tortilla. Toast quesadillas in skillet for a couple minutes on each side, till cheese is melted and tortillas are lightly browned.

Serve with extra barbecue sauce for dipping, if desired.

Recipe Source: Mrs Harding Cooks

Tuesday, September 23, 2014

Carnitas Tamale Pie

The Carnitas that we made were delicious, and we loved them. But this pie. Ahhhhhhmazing. So delicious, and yummy. The more cheese the better. The much better.
Carnitas Tamale Pie
Photo Credit to Pinch of Yum

Carnitas Tamale Pie
⅔ cup all-purpose flour
½ cup yellow corn meal
3 tablespoons granulated sugar
1 tablespoon baking powder
¼ teaspoon salt
2 tablespoons vegetable oil
1 can diced green chiles
⅓ cup milk
1 egg
1 can cream corn
2-3 cups leftover carnitas
1 cup enchilada sauce
1 cup shredded white cheese (Jack, White Cheddar, Pepperjack, etc.)

Preheat oven to 400 degrees. Whisk the cornmeal, flour, salt, baking powder, and sugar. Stir in the oil until the mixture makes soft crumbs. Whisk in the milk and egg. Add the cream corn and green chiles and stir until just combined. Bake in a 9-inch square pan (or larger, depending on how thick you want it) for 25 minutes or until set. Since it's a tamale-like base, it won't be completely dry like a cornbread. It's supposed to be just a little mushy.
Poke holes in the crust with a fork. Pour the enchilada sauce over the crust. Squeeze or drain excess moisture out of the carnitas and arrange on top of the crust. Sprinkle with cheese.
Reduce oven temperature to 350. Cover with foil, return to oven, and bake for 20 minutes. When everything is heated through, remove foil and let bake for another 5-10 minutes or until cheese is melted and bubbly.
Top with chopped cilantro, allow to cool for 5 minutes, and cut into slices or scoop into bowls.

Recipe Source: Carnitas Tamale Pie

Thursday, September 18, 2014

Shrimp Enchiladas

Another point for "making Mel my best friend even though she has no idea I exist." Kaching. This was a winner. Delicious, healthy, no cream-of-anything soups and...shrimp. I don't really need to say anything more.
Shrimp Enchiladas
Photo Credit to Mel's Kitchen Cafe
Shrimp Enchiladas
Cheese Sauce:
1/2 cup chopped red pepper
1/2 cup chopped yellow or white onion
1/2 cup chopped green pepper
2 tablespoons butter
1/2 teaspoon salt
1/2 teaspoon oregano
1/4 teaspoon garlic powder
1/4 teaspoon cayenne pepper
1/4 teaspoon black pepper
1 tablespoon all-purpose flour
3/4 cup whipping cream or milk
1 cup Monterey Jack cheese or Pepper Jack cheese
1/2 cup sour cream, light or regular
Shrimp Mixture:
1 tablespoon butter, canola oil, coconut oil or olive oil
1/2 cup onion, chopped
1 1/2 pounds shrimp, peeled, deveined and chopped into bite-size pieces
2 cups ripe tomatoes, chopped
1 1/2 cups Monterey Jack cheese or Pepper Jack cheese
8 (9-inch) flour tortillas

Preheat the oven to 350 degrees. Lightly grease a 9X13-inch dish and set aside.
Saute red pepper, onion and green pepper in 2 tablespoons butter until crisp-tender. Add oregano, salt, garlic powder, pepper, cayenne pepper, and flour; blend well and cook, stirring constantly for about a minute. Whisk in the cream or milk and continue cooking for 3 minutes or until slightly thickened. Add the cheese; stir until melted. Add sour cream, stir to blend. Set aside.
In another skillet, melt 2 tablespoons butter. Saute onion in the oil until translucent and soft, 3-5 minutes. Add the shrimp and cook until the shrimp are pink (don't overcook or the shrimp will be tough). Add chopped tomatoes and 1/2 of the cheese sauce. Spoon 1/3 cup shrimp mixture into each tortilla. Sprinkle a bit of cheese on top of shrimp mixture. Roll the enchiladas up tightly. Arrange seam side down in a 9X13-inch glass baking dish. Spoon remaining cheese sauce over tortillas and sprinkle with remaining cheese.
Bake at 350 degrees for 30 to 35 minutes.

Recipe Source: Mel's Kitchen Cafe

Tuesday, April 1, 2014

{Mom's} Enchiladas

These are my mom's "famous" easy enchiladas. I love them because they're fast, easy, and delicious!
Lawry's® Enchiladas
Photo Credit to McCormick
{Mom's} Enchiladas
1 package flour tortillas
1 1/2-2 pounds hamburger
1 onion, diced
Lawry's enchilada sauce packet
3 cups water
1 6 ounce can tomato paste

Preheat oven to 350.
Make sauce according to package directions. Put a little sauce on the bottom of a 9x13 pan.
Brown hamburger with onion. Put 3/4 of the rest of the sauce with the hamburger and mix well. Put mixture inside tortillas, roll, and put into the pan. Cover with the rest of the sauce, and cheese.
Bake for 30 minutes covered. Remove cover and bake for 10 more minutes.

Recipe Source: Susan Warren

Sunday, March 30, 2014

Fish Tacos

I love Mexican food and I love seafood. So I absolutely love when these two these are put together! Especially when it's quick!

Fish Tacos
1 pound fresh/frozen fish; cod, orange roughy, tilapia, etc.
1 1/2 cups shredded cabbage
1 teaspoon lime/lemon juice
4 tablespoons mayo
2 tablespoons plain yogurt
garlic salt
tortilla shells
salsa

Bake fish for 8-10 minutes at 375 until it flakes easily. Mix the rest of the ingredients except the tortilla shells & salsa.
On tortilla shell, put fish, cabbage mix & salsa.

Recipe Source: Sharrie Webster

Friday, February 7, 2014

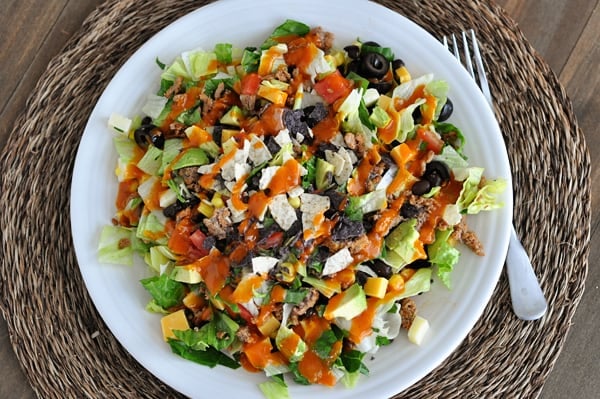
Chopped Taco Salad with Homemade Catalina Dressing

I love salads, especially lately. I honestly don't know why. This one is a simple taco salad, but what I really love about this recipe is the Catalina dressing. I've never tried Catalina before, so I'm not sure how it compares...but I love it!
Chopped Taco Salad
Photo credit to Mel's Kitchen Cafe
Chopped Taco Salad with Homemade Catalina Dressing
1/2-1 pound ground turkey or beef
1/2 head romaine lettuce, chopped
1/2 head iceberg lettuce, chopped
1/2 cup cilantro chopped
1 cup cubed (small) cheese, cheddar, Monterey Jack, Pepper Jack, etc.
1 cup frozen or fresh corn kernels (thawed if frozen)
1 6-ounce can olives, chopped {I didn't put these in because…I don't like olives. Gasp!}
1 15-ounce can black beans, rinsed and drained
2 roma or plum tomatoes, chopped
1-2 avocados, chopped
Crushed tortilla chips

Dressing:
1/4 cup ketchup (see note)
1/4 cup granulated sugar
1/4 cup red wine vinegar
1/4 cup onion finely chopped
1/2 teaspoon paprika
1/4 teaspoon Worcestershire sauce
1/2 cup extra-virgin olive oil
Salt and pepper to taste

In a large, nonstick skillet, brown the ground turkey or beef with salt and pepper (about 1 teaspoon of each) until cooked through, breaking up the meat into bite-size pieces as it cooks. Drain excess grease if needed. Scrape the meat onto a paper towel-lined plate and set aside to cool a bit.
For the dressing, combine all the dressing ingredients together in a blender and process until smooth. Refrigerate until ready to serve. The dressing can be made up 3-4 days in advance.
In a large bowl, toss all the salad ingredients together (including the cooled meat) except the crushed tortilla tips.
Serve the salad with the dressing and crushed tortilla tips.
Recipe Source: Mel's Kitchen Cafe

Thursday, November 21, 2013

Easy Delicious Fajitas

Got these from Sharrie. Like most of her recipes, super easy, healthy and too delicious. Thank you for easy, Sharrie!
Chicken Fajitas Recipe
Photo Credit to Taste of Home
Easy Delicious Fajitas
1 pound beef, chicken, or pork, sliced thin {or shrimp, halibut…whatever you feel}
1/2 cup italian dressing
1/2 cup salsa
2 tablespoon lime juice
1/2 onion, sliced
1 red/green pepper, sliced
Optional, for toppings:
Tomatoes, diced
Sour cream
Cheese
Tortilla shells
Avacado/Guacamole

Place meat, dressing, salsa, and lime juice in a bag and squish together. Place in fridge for at least two hours. Heat skillet, pour meat and marinade in pan and boil for 2-3 minutes. Add onion, pepper and cook for 3 more minutes.

Serve with tortilla shells and other toppings.

Recipe Source: Sharrie Webster

Wednesday, November 20, 2013

{Healthy} Beef and Bean Enchiladas

Awesome. Delicious. And guess what kind of beef I used? Canned. From the Lindon Cannery. It was delicious and it was so easy because of the canned meat.
Photo Credit to canyoustayfordinner.com
{Healthy} Beef and Bean Enchiladas
2 tsp olive oil
2 cups sliced bell peppers, any color
1 medium onion, sliced
2 cloves garlic, minced
8 oz lean ground sirloin
1 15 oz can black beans, drained and rinsed
1 tablespoon chili powder
1 tablespoon ground cumin
½ tsp paprika
pinch cayenne pepper
½ tsp salt
12 6″ whole wheat tortillas {I used 8-10" tortillas)
1 16 oz jar salsa, divided
1 cup shredded Monterrey Jack cheese, or any blend you like

Heat a large skillet over medium high heat. Add olive oil, swirling to coat. Add the peppers and onions and saute for about 5 minutes, until softened. Add the garlic and stir for 30 seconds.

Add ground beef {or canned shredded beef} and use a fork to crumble it. Cook for about 4-5 minutes, or until the mixture is no longer pink.

Stir in the chili powder, cumin, paprika, cayenne, salt, black beans, and ¼ cup of the salsa. Mix well.

Now preheat your oven to 350º F. Spread half of the remaining salsa over the bottom of a 13×9” baking pan.

Lay your tortillas on a clean work surface and spoon a heaping ¼ cup onto the center of each. Roll tightly and line them up, closely packed into the baking pan, seam side down.

When all of the tortillas have been filled and placed into the pan, evenly pour the remaining salsa over the top.

Sprinkle the pan with the cheese.

Bake for 20 minutes. Allow the enchiladas to cool for about 10 minutes before serving. Garnish with sour cream and fresh cilantro.

Recipe Source: Can You Stay for Dinner

Thursday, April 4, 2013

Creamy Green Chile Chicken Enchiladas

So you know when you eat something and go "That was delicious, filling, and totally healthy. I know that because I made everything from scratch." This is not one of those. Yes, it is filling, and made from scratch, and to die for delicious, but it is not healthy in any way.
That means I have to limit how I often I make this. Shoot.
Because it is rockin.
chicken enchiladas
Photo Credit to Mel
Creamy Green Chile Chicken Enchiladas
3 cups cooked, chopped chicken
2 (4 oz.) cans of green chiles, lightly drained
1 package (8 oz.) cream cheese, cubed
1 can white or black beans, rinsed and drained (you can really use any type of bean you prefer here)
Sauce:
2 tablespoons butter
1/2 cup chopped onion (about 1/2 medium onion)
2 tablespoons flour
1/3 cup chicken broth
¼ cup milk
¼ teaspoon salt
¼ teaspoon pepper
1 can (7 ounce) green chile enchilada sauce
½ cup sour cream

8 ounces (about 2 cups) Monterey jack cheese, shredded
8 medium (soft taco size) flour tortillas
Handful of chopped fresh cilantro

Preheat oven to 375 degrees.
In a medium bowl, combine the softened cream cheese and green chiles. Mix well. Add the chicken and black beans. Mix to combine. Set aside.
In a large nonstick skillet, melt the butter over medium heat. Add the onion and cook, stirring occasionally, until the onion softens and starts to turn translucent, about 3-4 minutes. Sprinkle the flour over the onions and stir well. Cook for 1 minute, stirring. Slowly whisk in the chicken broth and milk. As you whisk and the mixture cooks, the flour will get less lumpy around the onions and the mixture will become smooth. Cook over medium heat until the mixture is bubbling and has thickened, about 4-5 minutes. Remove the skillet from the heat and stir in the enchilada sauce and sour cream.
Lightly grease a 9X13-inch baking dish. Spread about 1/4 cup of the sauce on the bottom of the dish. Fill each tortilla with about ½ cup of the chicken/cream cheese filling. Top with a small handful of shredded cheese, a couple tablespoonfuls for each enchilada. Save at least 1/2 cup cheese for the top of the enchiladas. Roll the tortillas up and place seam side down in the prepared baking dish. Continue filling enchiladas until the dish is full (I can easily fit 8 enchiladas in one pan).
Pour the white sauce over the top of the enchiladas. Top with remaining cheese. Bake for 20-30 minutes until the enchiladas are bubbling, hot and lightly browned. Sprinkle fresh cilantro over the top and serve.

**Make Ahead Instructions: Follow the recipe instructions, letting the sauce cool to warm room temperature before proceeding with filling the enchiladas. Assemble the enchiladas as directed in the recipe with the cooled sauce. Cover the baking pan with plastic wrap and refrigerate for 8-12 hours before baking. Bake according to the recipe, adding an additional 5-10 minutes if needed since the enchiladas were refrigerated. Alternately, after assembling, the baking pan can be covered with a double layer of foil and put in a jumbo-sized resealable bag and frozen for up to two months. Bake from frozen by decreasing the baking temperature to 350 degrees F and baking the enchiladas covered for 1 1/2 hours. Uncover and bake an additional 30 minutes to 1 hour until the dish is hot and bubbly.

Recipe Source: Mel's Kitchen Cafe

Thursday, March 7, 2013

{Healthy} Bean & Rice Burritos

Mom's Who Think is a website that I have not fully checked out, but I'm sure it has some awesome stuff. The one thing I have checked out is the planned dinner for a week. And I found healthy planned dinners. For weeks. Thank you women who think!! This is one of those recipes and it was d-lish!
Photo Credit to Taste of Home
{Healthy}Bean & Rice Burritos
1 cup cooked brown rice
1 cup cooked black beans, rinsed and drained if canned
1 ½ teaspoons minced canned chipotle chiles in adobo sauce
2 red bell peppers, thinly sliced
1 carrot, thinly slice diagonally
1 Tablespoon olive oil
½ teaspoon salt
4 (10 inch) fat free flour tortillas

Combine the rice, beans, and chipotles in microwave safe bowl and mix well. Cover with plastic wrap and microwave on high power until hot, about 4 minutes, stirring after 2 minutes. Set aside.

Combine the bell peppers, carrot, and oil in another microwave safe bowl and toss to coat. Add the chili powder and salt, toss to mix. Cover with plastic wrap and microwave on high power until softened, about 4 minutes, stirring after 2 minutes.

Warm the tortillas as package label directs and lay out on a work surface. Spoon the rice mixture across the center, and top with the vegetable mixture.

Fold the bottom end upward, covering the filling by 2 inches. Tightly fold both sides inward, overlapping slightly. Wrap the top side over.

Serve with lightly buttered corn.

Recipe Source: Mom's Who Think

Chicken Enchilada Soup

I've gone to a cooking class with my mom a couple of times. It's simple and not super formal and has really delicious, not healthy at all foods. Take this one, for example. No health, really, but so freaking delicious! I hope you love it.
Photo credit to Real Mom Kitchen

Chicken Enchilada Soup
2 1/2 tablespoon corn oil
1 cup chopped onion
2 garlic cloves
2 4 ounce cans of diced green chiles
9 cups water
4 teaspoon beef bouillon
4 teaspoon chicken bouillon
2 cans cream of chicken soup
1 pound cooked chicken, shredded
2 tablespoons A-1 sauce
4 teaspoons worcestershire sauce
2 teaspoons cumin
2 1/2 teaspoons chili powder
1/2 teaspoon black pepper
24 corn tortillas
6 cups shredded cheddar cheese
1/2 teaspoon paprika

Saute the onion and garlic in oil. Add remaining ingredients except cheese, tortillas, and paprika. Bring to light boil. Cover, reduce heat and simmer 20 minutes. Cut tortillas in 1/2 inch strips and grate cheese. Add remaining ingredients and simmer for 10 more minutes. Remove from heat and serve.

Recipe Source: Lesa Swenson

Wednesday, January 23, 2013

Sweet Potato Tacos

My good friend, Laurel, not so lightly urged me to try these tacos. I'm SO GLAD I did!! They are awesome! Take tacos, add a little sweet, but awesomely healthy. These tacos. Saweet.
Photo Credit to the Blanchard Bistro
Sweet Potato Tacos
½ pound ground beef or turkey {I used a full pound, but will use 1/2 next time}
2 Tablespoons taco seasoning {I used one packet}
½ cup tomato sauce {I used a whole can}
1 can (15 oz.) black, kidney, or pinto beans, drained
5-6 cups sweet potatoes, peeled and cut into 1/2-inch cubes
2 tablespoons butter
½ teaspoon salt
1½ cups chopped fresh spinach
1½ cups shredded cheddar cheese
tortillas, sour cream, salsa, fresh cilantro, and/or guacamole for garnish

Preheat oven to 425ºF. Brown ground meat in a skillet over medium-high heat. Stir in taco seasoning, tomato sauce, and beans. Set aside.

Spray a 9x13 inch casserole dish with non-stick spray. Place sweet potato cubes in the pan and top with the butter and a sprinkle of salt. This is where you'd add the spinach if you had it, but if you don't, it's still darn yummy. Then add the taco meat and bean mixture and the cheese {I added the cheese when I assembled the tacos}. Cover with foil and bake for 25-30 minutes, until the sweet potatoes are tender.

Serve in a tortilla with sour cream, salsa and a few sprigs of fresh cilantro. And guacamole if you have some.

Makes 6 servings.

Notes {from Kimma, where I found the recipe}:
This may be my fastest turnaround from seeing a recipe to saving it (on Pinterest, of course) to making and eating it to photographing and blogging it. All done in just about a day and a half! And that's saying something. I'm really on a sweet potato kick at the moment, so whenever I see a recipe doing something creative with them, I get really excited. And this one was really, really great. A keeper, for sure. Especially with homemade tortillas, as seen in the photo above (only because we didn't have any from the store, but now I wonder if I'll ever go back!).

I've made this multiple times now - we LOVE it! I even tried it in the slow cooker recently and it worked like a charm. I did up the sweet potatoes to 3 medium sized (probably closer to that 6 cups of cubed sweet potato that the original recipe calls for, but I'm not totally sure because I didn't actually measure). I also added a whole can (1 cup) of tomato sauce to the meat/bean mixture just because I didn't want to have a half can sitting in my fridge and then going moldy (that's what happened last time). It was perfect. Still haven't tried it with spinach, but I think it would be wonderful. Black or kidney beans are my usual choices. And I don't add cheese in the oven/slow cooker (I did the first time, but ever since nope) - I just sprinkle some on top as garnish in my taco shell.

Recipe Source: The Blanchard Bistro

Thursday, January 10, 2013

Cowboy Dinner

This is one of the two dinners that Scott requests all the time. I would say his favorite dinner of all time. It's easy, quick, and pretty healthy. Sweet, salty, and hearty. Seriously, make this and you will love your life.
Photo Credit to melskir
Cowboy Dinner
9x13 pan
1-1 1/2 pounds lean ground beef {or ground turkey}
1 medium yellow onion, diced
1 teaspoon salt
1/2 teaspoon black pepper
1 cup-1 can corn
1 can green beans {this was my addition}
1 1/2 cups salsa (jarred or homemade)
1 can (15 ounce) black, pinto or white beans, rinsed and drained
1 cup shredded cheddar cheese

Cornbread Topping:
½ cup cornmeal
1 ½ cup flour
1/3 cup sugar
1 tablespoon baking powder
½ teaspoon salt
1/3 cup oil
2 eggs, beaten
1 ¼ cup milk

DIRECTIONS:
Preheat the oven to 375. Lightly grease a 9X13-inch pan and set aside.

In a large 12-inch skillet, brown the ground beef and onion, adding the salt and pepper, over medium-high heat until the beef is no longer pink. Drain the grease from the pan. Stir in the corn, salsa, and beans. Pour the beef mixture into the prepared 9X13-inch baking pan and set aside.

For the cornbread, combine the cornmeal, flour, sugar, baking powder and salt in a medium bowl. Make a well in the center and add the oil, beaten eggs and milk. Whisk together until just moistened and no dry spots remain.

Sprinkle the cheese over the beef mixture and pour the cornbread batter over the cheese and beef mixture. Gently spread the cornbread to the edges of the pan, evening it out over the top of the casserole.

Bake for 30-40 minutes until the edges are bubbly and a toothpick inserted into the center of the cornbread comes out clean or with a few moist crumbs. Let the casserole stand for 10 minutes before serving.

Recipe Source: Slightly adapted from Mel’s Kitchen Cafe

Saturday, December 8, 2012

{Overnight} Breakfast Enchiladas

Photo Credit to Shelbi Keith
Easy, delicious breakfast recipes are few and far between. This one is awesome. Maybe not the healthiest because of all the cheese, but SO delicious.

Breakfast Enchiladas
2 cups Cubed, Cooked Ham
½ cups Chopped Green Onions
2-½ cups Shredded Cheddar Cheese, Divided
10 whole Flour Tortillas
2 cups Half-and-half
6 whole Eggs
1 tablespoon Flour
Salsa, To Serve

Prep this the night before and cook in the morning.

Stir together ham, green onions and 2 cups of cheese. Use a 1/3-cup measuring cup to scoop out cheese mixture onto a tortilla. Roll up tortilla and place seam side down in a 9 x 13 inch baking dish. Roll up all tortillas and squeeze them into the baking dish.

Whisk together half-and-half, eggs and flour. Pour over tortillas. Cover and let sit overnight.

In the morning, preheat oven to 350ºF. Bake for 30-40 minutes. Remove and sprinkle remaining 1/2 cup of cheese over enchiladas. Bake for 10 more minutes. Serve with salsa.

Recipe Source: Tasty Kitchen

Salsa & Chicken Fettuccine

The other day {which could mean pretty much whenever-two days ago, seven months ago...} I was looking for something fast {not because I was procrastinating or anything...} for dinner, and that I could feed a lot of people {so I doubled it}. This was simple, fast, and yummy, I think partly because of the awesome salsa I used. I helped to can the salsa from the family cannery in Lindon, UT...and it is fantastic.
Salsa and Chicken Fettuccine | Taste and Tell
Photo Credit to tasteandtellblog.com
Salsa & Chicken Fettuccine
Serves 3-4
1/2 pound fettuccine
1/2 cup salsa
1/2 cup sour cream
1/2 cup freshly grated parmesan cheese
1 cup cooked, chopped chicken
chopped fresh cilantro

Bring a large pot of salted water to a boil. Cook pasta until al dente; drain and return to pot.
In a small pot, combine the salsa, sour cream and parmesan. Cook over medium heat until hot. Pour the hot sauce over the cooked fettuccine and stir until coated. Add in the chicken and stir to combine. Serve topped with cilantro.
Recipe Source: Taste & Tell 

Thursday, December 6, 2012

{Healthy} Creamy Chicken Enchiladas

Although I put a lot of unhealthy, fatty, delicious recipes up here {no, I'm not apologizing}, But this is healthy delicious. I know, awesome right. I get a free calendar every year from livebetteramerica.com and I love it, I get to make a new {healthy} recipe every month! 
Healthified Creamy Chicken Enchiladas
Photo Credit to livebetteramerica.com
Creamy Chicken Enchiladas
Makes 9x13 pan
1 tablespoon olive oil
1/2 cup chopped onion {1 medium}
2 teaspoons finely chopped garlic
2 cups chicken broth
3 tablespoons all-purpose flour
1/2 teaspoon ground coriander or cumin
1/8 teaspoon pepper
1/2 cup reduced-fat sour cream
2 cups shredded cooked chicken breast
1 cup frozen corn, thawed {or canned}
1 cup shredded reduced-fat Mexican cheese blend
1 can (4 oz) chopped green chiles
1/4 cup chopped fresh cilantro
8 corn or flour tortillas
1 medium tomato, chopped (3/4 cup)
4 medium green onions, sliced (1/4 cup)
Salsa, if desired

Heat oven to 350°F. Spray 13x9-inch (3-quart) glass baking dish with cooking spray.
In 10-inch nonstick skillet, heat oil over medium heat. Add onion and garlic; cook 3 to 4 minutes, stirring occasionally, until onion is tender. In medium bowl, stir broth, flour, coriander and pepper with wire whisk until blended. Slowly add to hot mixture in skillet, stirring constantly. Cook and stir 5 to 6 minutes, until mixture boils and thickens slightly. Remove from heat. Stir in sour cream until well blended.
In another medium bowl, mix chicken, corn, 1/2 cup of the cheese, the chiles, cilantro and 1/2 cup of the sauce. Place 2 tortillas at a time on microwavable plate; cover with paper towel. Microwave on High 10 to 15 seconds or until softened. Spoon about 1/3 cup chicken mixture down center of each warm tortilla. Roll up tortillas; arrange, seam sides down, in baking dish. Top enchiladas with remaining sauce. Cover with foil.
Bake 30 to 35 minutes or until sauce is bubbly. Remove from oven. Uncover; sprinkle with remaining 1/2 cup cheese. Let stand 5 minutes before serving. Just before serving, top with tomato and green onions. Serve with salsa.

Recipe Source: Live Better America

Friday, June 15, 2012

Southwest Egg Rolls with Creamy Chipotle Dipping Sauce

I wanted something easy and fast the other night while we were staying with my lil sis. I had cooked chicken, which made this really fast. And it was spicy and so yummy. I could've eaten three or four...but they were very filling! And the adobo chilies? Awesome; I recommend not skipping over these. The perfect smoky "southwest" flavor I was expecting.

Photo Credit to melskitchencafe.com
Southwest Egg Rolls with Creamy Chipotle Dipping Sauce
Makes about 15
1 tablespoon olive oil
1 medium yellow or red onion, diced
2 cloves garlic, finely minced
3 (about 1 1/2 pounds) boneless, skinless chicken breasts, cubed {I used cooked, shredded chicken}
1 green or red pepper, diced small
1 jalapeno pepper, membranes removed, seeded and finely minced or 4 pickled jalapeno rounds from the jar
1 can black beans, rinsed and drained
10 ounces frozen, chopped spinach, defrosted and liquid squeezed out (wringing through a kitchen towel works great) {I used fresh and chopped it up and probably used way more than 10 ounces, I suggest this!}
1 cup frozen corn {I used canned}
1 teaspoon cumin
1 teaspoon chili powder
1/4 cup freshly chopped cilantro
1/2 teaspoon salt
1/2 teaspoon pepper
2-3 cups shredded cheese, such as Monterey Jack, Pepper Jack or Cheddar
2-3 dozen small, fajita-size flour tortillas {I used 10", so only used about 15}

1 cup sour cream
1/4 cup salsa
1 teaspoon minced chipotle chiles in adobo sauce (if you are opening a new can to only use 1 teaspoon, freeze the remainder in a freezer-safe ziploc bag and pull out and thaw as needed) {I found them with the Mexican stuff}

Preheat the oven to 400 degrees. Line two rimmed baking sheets with foil and lightly grease with cooking spray. Set aside.

In a small bowl, combine the dipping sauce ingredients. Mix well and set aside or refrigerate until ready to serve.

In a large 12-inch nonstick skillet, heat the olive oil over medium heat. Add the onion and saute for 3-4 minutes until softened. Add the garlic and cook for about 30 seconds, stirring constantly. Add the cubed chicken breasts and peppers and cook over medium or medium-high heat, stirring occasionally, until the chicken is cooked through, about 5 minutes {I didn't spend any time here as my chicken was already cooked}. Add the rinsed and drained black beans, spinach, corn, cilantro and seasonings. Mix well and cook until the mixture is heated through. Add the cheese and stir well, cooking, until the mixture is hot and cheese is mostly melted.

Warm the tortillas. I place 5-6 between two damp paper towels and microwave for about 45 seconds. Place some of the filling on each tortilla and roll up tightly, egg-roll style, folding in the edges. Place seam side down on the prepared baking sheets (secure with a toothpick if needed).

Bake at 400 degrees for 15 minutes, until the rolls are lightly browned and heated through. Serve immediately with dipping sauce. {Or freeze and reheat later, they're a little more soggy, but so good}

Recipe source: Mel's Kitchen Cafe

Tuesday, May 15, 2012

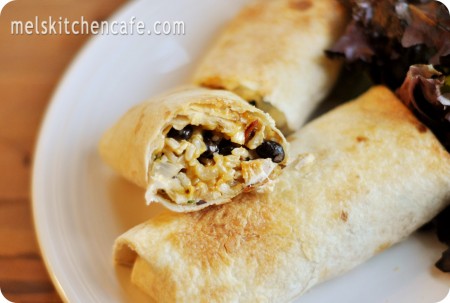
Oven Baked Chimichangas

These are really easy and quick, which is nice. And I really love all things "Mexican" so, of course I loved these!
Oven Baked Chimi
Photo Credit to melskitchencafe.com
Oven Baked Chimichangas
Makes 6 chimichangas
1/4 cup canola or vegetable oil
1 onion, chopped fine
1 (16-ounce) can black beans, drained and rinsed
1 1/2 cups cooked brown or white rice
2-3 cups diced, cooked chicken
1-2 teaspoons minced canned chipotle chiles in adobo sauce (use the lesser amount for less heat, greater amount for a bigger kick)
1 cup shredded cheddar or monterey jack cheese (or a combination of both)
1/2 cup finely chopped fresh cilantro
Salt and Pepper
6 large burrito-size flour tortillas

Place a rimmed baking sheet in the oven and heat the oven to 450 degrees. While the oven is heating, in a large skillet, heat 2 tablespoons of the oil over medium heat until the oil is shimmering. Cook the onion until it is just softened, about 3 minutes. Stir in the beans, rice, chicken and chipotle and cook until the mixture is heated through, about 3 minutes. Off the heat, stir in the cheese and cilantro. Season with salt and pepper to taste (I used about 1/4 teaspoon each).

Stack the tortillas on a plate and cover with a damp paper towel. Microwave the tortillas until they are warm and pliable, about 1 minute. Top each warm tortilla with some of the chicken mixture, leaving about a 2-inch border at the bottom of the tortilla. Fold in the sides and roll up the tortilla tightly. Brush the wrapped tortillas with the remaining oil and arrange them seam side down on the hot baking sheet that has been preheating in the oven. Bake until the chimis are golden brown and crisp, about 8 to 10 minutes. Serve.

Recipe Source: Mel's Kitchen Cafe