Saturday, June 30, 2012

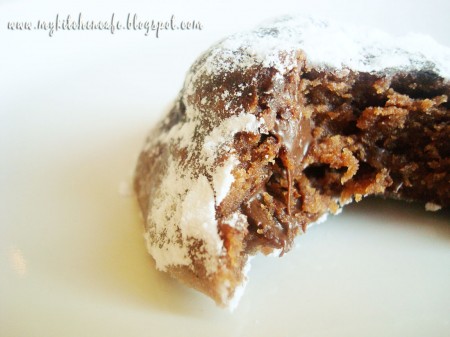
Chocolate Truffle Cookies

Easy and Delicious. Wonderful!! I would make these when that time of the month came...or when you're just feeling a little too hormonal! Because it's luscious chocolate covered in sugar. Yep.

Photo Credit to melskitchencafe.com

Chocolate Truffle Cookies
Makes about 3 dozen cookies

INGREDIENTS:
1 1/4 cups (2 1/2 sticks) butter, room temperature
2 cups powdered sugar
1/3 cup unsweetened cocoa powder
1/4 teaspoon salt
1/4 cup sour cream or plain yogurt
1 teaspoon vanilla extract
2 1/4 cups all purpose flour
2 cups semisweet or bittersweet chocolate chips
approximately 1/3 cup cocoa powder (for rolling)
approximately 2/3 cup powdered sugar (for rolling)

DIRECTIONS:
Preheat the oven to 325 degrees. Line two baking sheets with parchment paper or silpat liners.

In a large bowl, cream together the butter and powdered sugar, adding the sugar in slowly so that it doesn’t puff everywhere and transform your kitchen into a white mess. In a fine mesh strainer/sieve, place the cocoa powder and salt and sift this mixture into the butter/sugar and mix until well combined. Beat in the sour cream and vanilla extract. With the mixer on low, blend in the flour until no streaks of flour remain. Stir in the chocolate chips.

If your kitchen is very warm and the dough is hard to handle, refrigerate the dough for 30 to 60 minutes before rolling.

Shape the dough into 1-inch balls and roll each ball lightly in the cocoa powder and place on the baking sheet. Do not flatten the cookies. The cookies will not spread very much if the dough is chilled, so they can be placed fairly close together.

Bake the cookies for 10 minutes. They will just barely be set but you don’t want to overbake or they will be dry. Let them cool on the baking sheet for 3-5 minutes and then transfer them to a wire rack to cool completely.

When the cookies have reached room temperature, after about 30-45 minutes, roll each cookie in powdered sugar until completely coated. Store in an airtight container.

Recipe Source: Mel's Kitchen Cafe
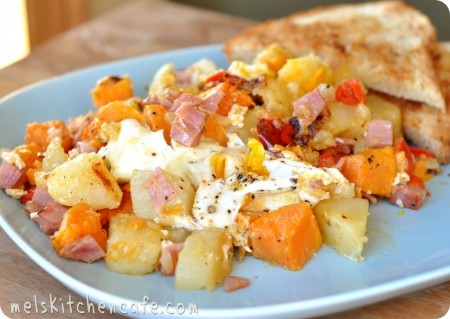
Ham and Sweet Potato Hash

I love making breakfast. Almost more than desserts...almost. This is one of those super hearty 'I worked out this morning and am STARVING' breakfasts. It's delicious...and quite spicy. But I loved it and will be making it over and over again.
Sweet Potato Hash
Photo Credit to melskitchencafe.com

Ham and Sweet Potato Hash
Serves 4-6

3 russet potatoes, peeled and cut into 1/2-inch chunks
3 small sweet potatoes, peeled and cut into 1/2-inch chunks
2 tablespoons olive oil
1/2 teaspoon salt
1/2 teaspoon pepper
1 onion, minced
1 red bell pepper, seeded and diced
1 teaspoon minced canned chipotle chiles in adobo sauce (I would do 1/2 tsp...it was WAY spicy)
3 tablespoons heavy cream
10 ounces thinly sliced deli ham, cut into 1/2-inch pieces
6 large eggs

In a medium microwave-safe bowl, toss the potatoes with 1 tablespoon oil, salt and pepper. Cover the bowl with plastic wrap or a tight-fitting microwave-safe lid and microwave for about 6 minutes, until the potatoes are tender but not overcooked – they’ll cook a bit more in the skillet later. Stir the potatoes halfway through cooking. Drain the potatoes of any excess liquid and set aside.

Heat the remaining 1 tablespoon oil in a large nonstick skillet over medium heat until the oil is hot and rippling. Add the onion and bell pepper and cook, stirring often, until the vegetables are tender, about 4-5 minutes. Stir in the chipotle and cook for about 30 seconds.

Stir in the drained potatoes and the cream. Using the back of a spatula, pack the potatoes into the pan, pressing them into a somewhat even layer. Let the potatoes cook without stirring them for about 2 minutes so they can start to get nicely browned. Flip the potato hash mixture, one portion at a time, and lightly repack into the skillet to let the potatoes brown on the other side. Continue this flipping process every few minutes until the potatoes are nicely browned, about 8-10 minutes.

Stir in the ham and lightly repack the hash into the skillet. Using a large spoon, make 6 shallow divots about 2 inches wide in the surface of the potato mixture. Crack one egg into each indentation. Season with salt and pepper and then reduce the heat to medium-low and cover the skillet. Let the mixture cook until the eggs are set to your liking, about 5-7 minutes. Serve.

Recipe Source: Mel's Kitchen Cafe

Friday, June 15, 2012

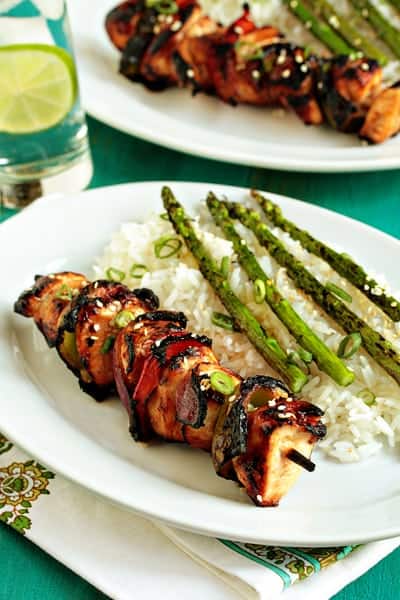
Asian Chicken Kebabs

Well, I planned this meal since it's so wonderfully summer outside...but when I went to use my parent's grill, it wouldn't work. I thought I was just too dumb to start the darn thing. When Scott finally got home from work, he informed me that it was out of propane. My lil sis then suddenly remembered that the propane was out. Even though she watched me struggle for at least 30 minutes. Convenient...
Anyway, that needed to be said because we ended up baking these rather than grilling them, but the marinade was scrumptious! We all (even Mal) liked it! I recommend (with a grill, I will add).

Post image for Asian Chicken Kebabs
Photo Credit to mybakingaddiction.com
Asian Chicken Kebabs
Serves 4
1/4 cup soy sauce
1 teaspoon sesame oil
2 tablespoons honey
1-2 teaspoons Sriracha
3 slices fresh ginger root
2 cloves garlic, crushed

4 skinless, boneless chicken breast halves, cubed
1 large green bell pepper, cut into 2 inch pieces
1 red onion, cut into wedges
1 large red bell pepper, cut into 2 inch pieces

In a small microwave-safe bowl, combine the soy sauce, oil, honey, Sriracha, ginger root, and garlic. Heat in microwave on medium for 1 minute, then stir. Heat again for 30 seconds, watch closely so it doesn’t boil. Set aside.

Thread the chicken, green bell pepper, onion, and red bell pepper pieces onto skewers alternately. Place skewers in a shallow baking dish and cover with marinade. Cover dish and refrigerate for at least 3 hours.

Prepare barbecue (medium-high heat). Grill Asian Chicken Kebabs until chicken is just cooked through, turning occasionally, about 9-12 minutes. 
{Or bake at 350 for about 17 minutes}

Recipe Source: My Baking Addiction

Tomato-Pesto Grilled Cheese

Photo Credit to anediblesymphony.blogspot.com
Okay, I know. Why would I record such an easy recipe. Umm...duh, because it's delicious, and totally worth the time!

Tomato-Pesto Grilled Cheese
8 slices bread {I used fresh wheat}
4 quarter-inch slices of fresh mozzarella
3 tomatoes, cut into thick slices
Fresh basil pesto, recipe follows {I used store-bought}
Freshly ground black pepper
Extra-virgin olive oil
Basil pesto:
1/2 cup pine nuts
2 cups fresh basil leaves
1 cup fresh Italian parsley leaves
1/2 cup Parmesan or Romano
2 garlic cloves
1/4 teaspoon salt
1/2 cup extra-virgin olive oil

Toast pine nuts in a skillet over medium heat until fragrant, about 5 minutes. Combine pesto ingredients in a food processor and pulse until well combined but still rough-textured.

If you have a panini press, turn it on to warm up; otherwise, set a skillet over medium heat.
Assemble sandwich by smearing insides of bread slices with pesto. Arrange a layer of sliced tomato and season with a few turns of fresh pepper. Layer the mozzarella slices over the top and then place another piece of bread on top to make the sandwich.
Drizzle olive oil over skillet's surface and place sandwiches on the hot skillet or panini press. Cook for 2-3 minutes until golden brown, flip if you're using a skillet; repeat. Serve...and enjoy heaven.

Recipe Source: Slightly adapted from An Edible Symphony

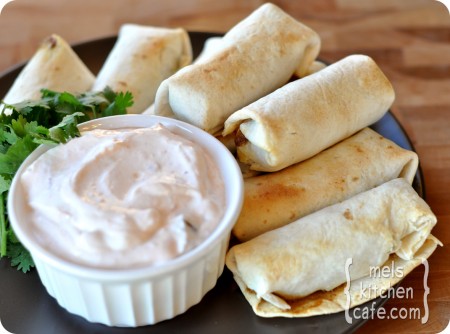
Southwest Egg Rolls with Creamy Chipotle Dipping Sauce

I wanted something easy and fast the other night while we were staying with my lil sis. I had cooked chicken, which made this really fast. And it was spicy and so yummy. I could've eaten three or four...but they were very filling! And the adobo chilies? Awesome; I recommend not skipping over these. The perfect smoky "southwest" flavor I was expecting.

Photo Credit to melskitchencafe.com
Southwest Egg Rolls with Creamy Chipotle Dipping Sauce
Makes about 15
1 tablespoon olive oil
1 medium yellow or red onion, diced
2 cloves garlic, finely minced
3 (about 1 1/2 pounds) boneless, skinless chicken breasts, cubed {I used cooked, shredded chicken}
1 green or red pepper, diced small
1 jalapeno pepper, membranes removed, seeded and finely minced or 4 pickled jalapeno rounds from the jar
1 can black beans, rinsed and drained
10 ounces frozen, chopped spinach, defrosted and liquid squeezed out (wringing through a kitchen towel works great) {I used fresh and chopped it up and probably used way more than 10 ounces, I suggest this!}
1 cup frozen corn {I used canned}
1 teaspoon cumin
1 teaspoon chili powder
1/4 cup freshly chopped cilantro
1/2 teaspoon salt
1/2 teaspoon pepper
2-3 cups shredded cheese, such as Monterey Jack, Pepper Jack or Cheddar
2-3 dozen small, fajita-size flour tortillas {I used 10", so only used about 15}

1 cup sour cream
1/4 cup salsa
1 teaspoon minced chipotle chiles in adobo sauce (if you are opening a new can to only use 1 teaspoon, freeze the remainder in a freezer-safe ziploc bag and pull out and thaw as needed) {I found them with the Mexican stuff}

Preheat the oven to 400 degrees. Line two rimmed baking sheets with foil and lightly grease with cooking spray. Set aside.

In a small bowl, combine the dipping sauce ingredients. Mix well and set aside or refrigerate until ready to serve.

In a large 12-inch nonstick skillet, heat the olive oil over medium heat. Add the onion and saute for 3-4 minutes until softened. Add the garlic and cook for about 30 seconds, stirring constantly. Add the cubed chicken breasts and peppers and cook over medium or medium-high heat, stirring occasionally, until the chicken is cooked through, about 5 minutes {I didn't spend any time here as my chicken was already cooked}. Add the rinsed and drained black beans, spinach, corn, cilantro and seasonings. Mix well and cook until the mixture is heated through. Add the cheese and stir well, cooking, until the mixture is hot and cheese is mostly melted.

Warm the tortillas. I place 5-6 between two damp paper towels and microwave for about 45 seconds. Place some of the filling on each tortilla and roll up tightly, egg-roll style, folding in the edges. Place seam side down on the prepared baking sheets (secure with a toothpick if needed).

Bake at 400 degrees for 15 minutes, until the rolls are lightly browned and heated through. Serve immediately with dipping sauce. {Or freeze and reheat later, they're a little more soggy, but so good}

Recipe source: Mel's Kitchen Cafe

Jalapeno Beef Kebabs

Thanks to Laurel, I found a whole bunch of grilling recipes to try. We made this one together, it was suprisingly delicious. Okay, I was surprised.
Jalapeno Beef Kabobs
Photo Credit to bhg.com
Jalapeno Beef Kebabs
1 10 ounce jar jalapeno pepper jelly
2 tablespoons lime juice
1 clove garlic, minced
4 small purple or white boiling onions (I used chopped yellow onions)
4 baby pattypan squash, halved crosswise (I used zucchini)
1 pound boneless beef sirloin steak, cut 1 inch thick
4 fresh tomatillos, husked and cut into quarters
1/2 of a medium red or green sweet pepper, cut into 1-inch squares

For glaze, in a small saucepan combine the jalapeno jelly, lime juice, and garlic. Cook and stir over medium heat until jelly is melted. Remove from heat.

In a small covered saucepan cook onions in a small amount of boiling water for 3 minutes. Add squash; cook for 1 minutes more; drain. Trim fat from steak. Cut steak into 1-inch cubes. On eight 6- to 8-inch metal skewers (I used bamboo soaked in water), alternately thread onions, squash, steak, tomatillos, and sweet pepper.

For a charcoal grill, grill kabobs on the rack of an uncovered grill directly over medium coals for 12 to 14 minutes or until meat is slightly pink in center, turning once and brushing occasionally with glaze during the last 5 minutes of grilling. (For a gas grill, preheat grill. Reduce heat to medium. Place kabobs on grill rack over heat. Cover; grill as above.)

Recipe Source: Better Homes and Gardens

Roasted Garlic-Tomato Spread

Photo Credit to ourbestbites.com
Dude. Try this. I haven't tried it on anything but a breakfast sandwich...but my mind reels at the possibilities of deliciousness with this spread.

Roasted Garlic-Tomato Spread
Makes just over one cup
1 head roasted garlic {I learned how to roast garlic at ourbestbites.com as well!}
1/2 C sliced sun-dried tomatoes packed in olive oil and herbs
1/2 C mayonnaise
Kosher salt

Toss the garlic, tomatoes, and mayo in the food processor and turn that baby on. Pulse a few times to combine and then add kosher salt to taste. I add a generous pinch. Then turn food processor on and let it process. I actually let mine go for quite a while- it seems to take a while to really break down those tomatoes. I watch the color and when it’s nice and red like in my picture I know it’s how I like it.

Note: I made the breakfast sandwich from OBB and even though it was super easy...it was delish.

Recipe Source: Our Best Bites

Zucchini Cheese Quiche

I found this recipe and tried it for a friends baby shower. For a week, I stopped eating things with milk to see if it would get out of my breastmilk and help L with her acid reflux (or whatever it was). Therefore, I didn't try this at first. Everyone that tried it complimented me and kept talking about it...I was dying to try it! However, after a week and a half with no improvement in L, I tried it. Oh. My.
They were right, and I'm urging you to try it. If I could use force through a computer...I would.
Photo Credit to ourbestbites.com
Zucchini Cheese Quiche
Serves 6-8
1 single 9″ pie crust (I used store bought...don't judge)
1 lb zucchini, thinly sliced (about 3 small-medium zucchini)
1 Tbs butter
1/2 C diced red onion
3 garlic cloves, pressed or finely minced
kosher salt
black pepper
3 eggs
1/2 Tbs dijon mustard
1 1/2 Tbs fresh chopped oregano (or 1 1/2 tsp dry)
1/8 – 1/4 tsp red pepper flakes
5 oz gruyere cheese
1/4 C grated Parmesan cheese

Preheat oven to 375 degrees.

Place rolled out pie crust in a 9″ pie plate and flute edges. Place in fridge until ready to use.

In a large skillet on the stove-top, melt butter. Add onions and garlic and cook for about 1 minute, stirring frequently. Add sliced zucchini and add a sprinkle of salt (about 1/2 tsp) and a few cracks of black pepper. Cook, stirring occasionally, for 3-4 minutes until zucchini is softened. Remove pan from heat and set aside.

In a separate bowl lightly beat eggs. Add dijon mustard, oregano, red pepper flakes. Whisk until combined and then gently stir in Gruyere cheese.

Add egg and cheese mixture to zucchini mixture and toss until combined (I gave up the first time and added another egg because it wasn't coating the zucchini fast enough...please be patient. It will cover all the zucchini). Place mixture in prepared pie crust and sprinkle Parmesan cheese on top.

Bake for 40-50 minutes or until center is set and top is lightly golden (I only cooked mine from 30-40, so watch it carefully). Cool for at least 15 minutes before cutting. Can be served warm, at room temp, or even cold.

Recipe Source: Our Best Bites