 |
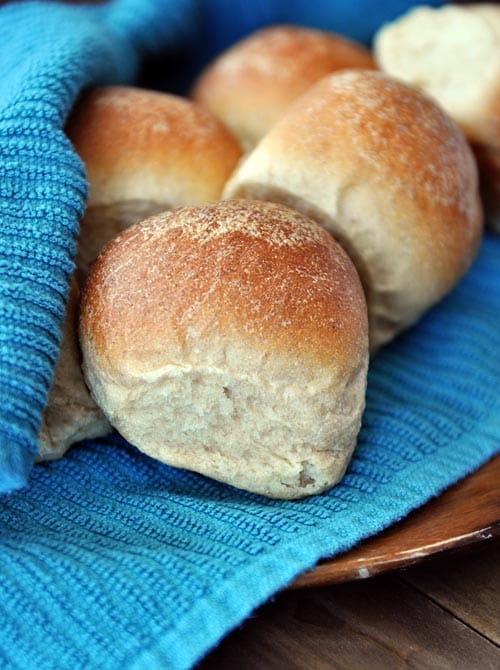
| Photo Credit to Mel's Kitchen Cafe |
3/4 tablespoon instant yeast (or 1 tablespoon active dry yeast)
2 tablespoons granulated sugar
2 tablespoons canola or vegetable oil
1 teaspoon salt
1/4 cup vital wheat gluten (see note)
3-4 cups whole wheat flour, give or take a little (see note)
In the bowl of a stand mixer or in a large bowl by hand, combine the warm water, yeast, sugar, oil, salt, gluten, and 2 cups of the flour. If you are using active dry yeast instead of instant yeast, let the yeast proof in the warm water and sugar for about 3-5 minutes until it is foamy and bubbly before adding the oil, salt, gluten and flour.
While mixing, gradually add the rest of the flour until the dough has pulled away from the sides of the bowl. Judge the dough by how it feels, not necessarily by the exact flour amount called for in the recipe (see a tutorial on working with yeast here). The dough should be soft and smooth but still slightly tacky to the touch.
Knead the dough in the stand mixer or by hand until it is very smooth and elastic, about 7 minutes in a stand mixer or 10-12 minutes by hand. As the dough is kneaded, it will continue to absorb some of the liquid and become less sticky so take care not to overflour at first as the texture will change as it kneads - and you can always add a bit of flour partway through if it seems overly sticky.
If kneading by hand, try using a bit of oil or cooking spray on the counter to help prevent stickiness instead of flour - that way the dough doesn't get overfloured. Lightly spray a large bowl with cooking spray and place the dough in the bowl. Cover the bowl with lightly greased plastic wrap. Let the dough rise until it has doubled, 1-2 hours.
Lightly punch down the dough and turn it out onto a lightly greased countertop. Divide the dough into 12 equal pieces and form the dough into round balls (a video tip on shaping the dough into rolls here).
Place the rolls on a lightly greased or silpat-lined baking sheet about an inch or two apart. Cover the rolls with lightly greased plastic wrap. Let the plastic wrap gently hang over the sides of the pan to fully cover the rolls but not press them down. Let the rolls rise until doubled, about 45 minutes.
Preheat the oven to 400 degrees. Bake for 12-14 minutes until lightly browned and cooked through.
Recipe Source: Mel's Kitchen Cafe